Showing posts with label free pattern. Show all posts

Friday, December 2, 2011

Free Pattern for Winter! The Diamond Scarf

In September, I took a chance on designing my very first knitting pattern. My goal was to do something so simple that even I could make it, and design a scarf that would look nice and yet highlight my pretty homespun. The result was my Diamond Scarf!


Well, it's now been written up, and tested, and I'm ready to release it to all of you, for free! It's my first pattern release since, er, the spring, I think, so I'm pretty excited about it!

Materials:
Worsted Weight Yarn (at least 150 yards)
Size 9 Knitting Needles

Finished Size:
Width: 11”
Length: 50”

The scarf can be easily shortened or lengthened as desired by using more or less yardage.

Gauge:
Approximately four stitches to the inch.

Abbreviations: Note that this pattern uses US definitions.
CO: Cast On
K: Knit
K2tog: Knit 2 together
YO: Yarn over

Directions:

You can modify the width of this pattern in intervals of five. Each interval of five increases or reduces the size by 1 and ¼ inch. Thus, if you want a scarf of 9 and ½ inches wide, only CO 33; or for a scarf of 13 and ½ inches wide, cast on 53; etc. To get a scarf approximate 11” wide, use the below instructions.

CO 43
Rows 1 – 8: Knit across

This pattern is constructed using a repeating 5 stitch motif.

Repeat the following pattern:
Row 1: K4, (K2tog, YO, K3) across, K4
Row 2: K4, purl across, K4
Row 3: K4, (K1, K2tog, YO, K2) across, K4
Row 4: K4, purl across, K4
Row 5: K4, (K2, K2tog, YO, K) across, K4
Row 6: K4, purl across, K4
Row 7: K4, (K3, K2tog, YO) across, K4
Row 8: K4, purl across, K4

Continue to desired length. Each repeat of this pattern adds approximately 2” in length. When you have repeated the pattern to the length that you would like, knit 8 rows, then bind off and finish.

Weave in ends. Block.

...And now you’re done!!

You can also download this pattern as a PDF from Ravelry by clicking this link!

Feel free to get in touch with me any time on his blog or on Ravelry if you have any questions!

Thursday, November 17, 2011

Back on Track, Step by Step

It's funny, no matter how many times I go through this process, it's always so easy to forget that getting things done is a matter of taking it one step at a time. As soon as I let things accumulate - oh, I'm so far behind! oh, I have so much to do! oh, how could I have let so much time pass! - it gets overwhelming so fast, yet in the end, it's always as simple as just doing one thing.

One blog post, earlier this week, to own up to how far behind I've gotten.

One pattern, that I know is ready to go and be tested, now up in Free Pattern Testers here. I went with something recent - the scarf I made in September - but it's still a bit ambitious. I'm pretty busy, and it's my first knit pattern, and I'm really a crappy knitter still (though I'm getting better - I'm actually working on two knit projects right now!)


Once the testing is done on this, I'll be distributing this pattern for free, which gets me back on track in the area of releasing free patterns.

One day at a time, one thing at a time, I'm NOT going to give up on the dream of pulling off a craft business!

Friday, March 18, 2011

The 1000 Amigurumi Crane Project

I've spoken in both of my blog posts this past week about my affection for Japan. In all my traveling, I've only ever found three places that I liked so well that I would want to live in them without any other temptation than just getting to be in them. These places are New York City (my home "town"), Tokyo and Venice. I've gotten to live in two of these cities - I was a resident in Tokyo for four months in 2007, and I feel in love. Even before that, I was a Japan-o-phile, studied Japanese for 6 years, and majored in East Asian Studies with a focus on Japan. There's no place like Tokyo in the world. I talk a lot about in this post (already linked in my WIP Wednesday, but I know I get some other folks for this post). Since last Friday, every day, I wake up feeling normal, and then at some point in my morning routine I remember that Japan is still in a state of crisis, and I look up the latest updates on the situation with the nuclear plant with a heavy heart, tears in my eyes, a little nausea, and the echoing thought that a place that I love is only 150 miles from such a potential disaster.

On Monday, I knew that I wanted to help. I went to the American Red Cross web page, and I donated as much money as I could afford. It felt totally empty. I kept thinking. I decided that if I can possibly manage it, I'm going to use my vacation in September to go and help with the rebuilding efforts that I'm sure will be well under way by then. It felt like too little, too late. I got dressed for the gym...and I had an idea. While I was at the gym, I let it percolate and develop. I ended up skipping out on work to implement that idea, and tonight it will be ready to go.

So, without more ado, let me introduce the 1000 Amigurumi Crane Project. The purpose of this project is simple: raise money for aid to Japan.

In Japanese culture, cranes are considered to be a sacred animal. There is an ancient myth that promises that anyone who folds a thousand origami cranes, threaded together on a string, will be granted any one wish by a crane. The gift of a string of a thousand cranes is considered to bestow good luck, happiness and prosperity, and strings of cranes are frequently given as gifts to newly weds, newborns, and as part of coming of age activities.


I've designed a pattern for crocheting an amigurumi crane that looks like the origami version of a crane. The basic pattern can be done either in sport-weight (pictured) or worsted weight, and turns out roughly 3 inches high, and 6 x 6 inches width/length. The worsted weight is a little bigger. There are also instructions for resizing the pattern to any other size within reason.

The 1000 Amigurumi Crane Project has 4 components:

1. The pattern. The pattern is just finishing up testing today. The regular pattern is already confirmed good to go; I'm just awaiting feedback on the resizing instructions. I've made the pattern live on Ravelry while still waiting that final feedback, because I can easily re-send the updated version to purchasers through their system. The pattern is $5. See the end of this post for more details on how the money end of this will work.

2. The finished dolls. I encourage you all to sell your finished dolls to raise additional funds. The regular dolls work up in about an hour - less once you get the hang of it - and are quite cute. My testers were thrilled. :) I've already donated one of my finished dolls (the orange one, pictured above) to a charity auction being done on Live Journal (here, if you're interested). There are several ways to go about donating your doll, such as an auction like the one I'm in, or posting it to a store you've got and donating the proceeds, or requesting a receipt as demonstration of donation and sending it. OR, if you don't want to bother, you can either send your doll to me, and I'll take care of figuring out a way to sell it, or you can join the Ravelry group, and we can match those who have cranes with those who want cranes. I'm selling the small cranes for $10 each, and larger cranes (made with the resizing more) priced accordingly, at roughly $10 an hour as the rate.

3. The commissions. Can't crochet and want a doll? Contact me and I'll make you one - within reason. If I get swamped, there's only so much I can do. This is where the matching comes in. :)

4. The community. An effort like this can't work without your help. I'm only one amigurumi crafter, and I'm a small fish in a very big sea. If you think this is a good idea, if you think this is something that can succeed, then please help even just by spreading the word, and encouraging those that you know to spread the word. I'll be distributing information by whatever means I can. I've made a group on Ravelry at The 1000 Amigurumi Crane Project, and over the next few days I'll be sharing it on every forum and group that I can think of - but I'm only one person, with a full time job, leaving for a business trip on Sunday. Even if you can't give - even if you've already given in another form - I know I've heard lots of crafters say in the past seven days that they wish that there was some way we as a community could band together to help. This is my attempt at doing that. I'll also be organizing a crochet-a-long.

I'm raising money in two ways:

1. Buy from me, pay my pay pal account, and when I've built up chunks, I'll pull the money and donate it to the American Red Cross. I'll be keeping updates of the fiscal end of things, including screen caps, in the Ravelry group and the blog for accountability purposes. The downside of this option is that I am not able to cover the percent of your purchase price that gets deducted as fees by Ravelry and/or Paypal and/or Etsy. The upside is that you can then download it immediately from Ravelry, you don't have to worry about anything except sending the money, the rest is up to me. This option will result in approximately 90% of your money going to the American Red Cross. The pattern is now available from Ravelry, and I'm still deciding if I'll put it up on Etsy (etsy has a larger following, but more fees associated with it). You can go directly to buy it here, or you can check out the pattern here if you're a member.

However, in case ya'll don't trust me (and I wouldn't blame you, the internet is rough that way!) there's the second option...

2. Receipts. Show me a receipt (with all personal info blurred out) demonstrating that you have donated the requisite dollar amount to a charity of your choice working for Tsunami Relief, and I will send you the pattern or doll that you've requested. This can be a cell phone bill showing a $10 text donation, a confirmation screen cap from the charity, or whatever else shows that you did it. In this case, I'm trusting you - and I do. I highly recommend the American Red Cross, with the downside being that they require a minimum donation of $10. The Japan Society in New York is also doing a funding drive that appears to accept smaller donations - you can access that here. The downside with this option is you'll have to wait for me to send the pattern for you (I try to have a less than 24 hours turn around on sending out patterns). If you have already donated and want the pattern or a doll, send me proof that you have made a donation of the requisite amount and I will send you the pattern. You can send this information to me at unforth@yahoo.com.

If you want to follow this more closely, feel free to follow me on Twitter (@unforth), join my on FB (fanpage is Curiously Crafted Creations), join the Ravelry group (The 1000 Amigurumi Crane Project) or just keep an eye on this blog. Contact me at unforth@yahoo.com, or Private Message me on Ravelry (Username: unforth) or anything else you feel like (ie, comment on this post) to get in touch with me and ask me questions - or if you have ideas to help! I'll admit, I'm hoping that other people will have other ideas to contribute to raise money for the 1000 Amigurumi Crane Project - but for now, I'm getting us started. :)

If we can sell 1000 amigurumi crane patterns, we can raise more than $4,500 for relief to Japan. If we can sell 1000 amigurumi crane dolls, we could raise an additional $10,000 or more. When I think of all the people that we could help, it brings tears to my eyes. Together, we can do more than any of us could dream of doing alone, and we can help bring joy and happiness and prosperity back to the people in Japan who are suffering. Thanks for your time, everyone.

FO Friday on Tami's Ami Blog
Fiber Arts Friday with Wonder Why Gal.

Edit: There are now more posts about the project! Use the 1000 amigurumi cranes tag, and there's an update in this post.

Friday, March 11, 2011

Throwing Down the Gauntlet (Two Pairs of Them, Actually!)

Well, it's another week of Finished Object (or, if you prefer, Fiber Arts) Friday! If it weren't for yesterday, I'd have felt like I had pretty much nothing to show for this week, but I spent about 12 hours crocheting yesterday so I've pulled something off. ;) Haven't finished either of my WIP from Wednesday, but I did publish my Andromeda Cowl Pattern (available on Etsy and Ravelry. I also went out and bought a huge pile of new yarn on Wednesday, most of which I have plans for, to make up for my much-depleted stash. I'll write more about this in the next day or two, or possibly next WIP Wednesday. ;)

More Starfish!
Last week, I presented Jose Estrella, the Starfish, and mentioned that I had variations of him in the works. The pattern is very easy to modify, and when I publish it I intend to include all the different options that I can think of, but that means first I have to make them. This week, I made two (which actually cover five of the available options - I'm trying to reduce my work load ;) )

Variation 1 and 2: The Red Serpent Starfish
This is a red serpent starfish:


...and here's an amigurumi Red Serpent Starfish!

This reflects two of the potential variations on my pattern:
1. modifying the limbs to be long and thin!
2. Working from the corners of the center body instead of from the sides (hard to explain but if you were looking at the pattern it'd make excellent sense. ;) )

Variation 3, 4 and 5: The Tree-Topper Star

Another alternate use of this pattern is to make a star that I think is perfect for a Christmas tree. This reflects another three potential variations on my pattern:
1. Remove the body texture (sc around instead of sc/dc around)
2. Make the whole starfish smaller
3. Lengthen the limbs as compared to the body size

Here are all three starfish, hanging out together...

The red serpent starfish has no respect for the personal space of others. :)

The Gauntlets
One of the March challenges in Nerd Wars is "Warrior's Friend." The idea is to make a shield, either literally or figuratively (an item to protect yourself or something you care about from harm). My main idea for this had originally been to modify my male doll pattern and make a version in full armor, but as I felt this would require me to learn to felt to really do it justice, and I just haven't the time, I changed my mind. Wednesday night and especially yesterday morning, inspiration struck as I was trying to figure out what project to bring to my totally dull, have-to-be-there-all-day meeting where nothing was actually expected of me. An excellent crocheting opportunity! (I frequently bring projects to such things and no one has given me a hard time yet...)

The result was two pairs of gauntlets. The first is the Shielding Gauntlet:

My main goal designing these was that they should fit me nice and snugly, and that they should have no mesh at all. At such, it's just sc except for the borders. I'm VERY happy with how they turned out - I used one of my favorite colorways (which unfortunately is Red Heart, but life goes on...). They fit just about perfectly, if I made them any more snug around the wrist they wouldn't fit over my hand. ;)

The second is the Roundel Gauntlet:

Sorry the picture is so shadowed. :( These were a much more daunting project, and designing them took a lot of trial and error. I had two goals when I designed them: first, that they should be largely lattice so that you could see through them, and two, that the main motif be inspired by a shield.

I'm not as thrilled as I could be, but I am satisfied. The main decoration runs down the center of the back, and is composed of two spirals flanking a roundel, hence the name. They're not quite lined up right just now, though, so I'm going to move the thumb catch tonight - it'll only take a couple minutes but will make me much happier with my FO. ;)

However! The real goal of all of this was to make two gauntlets that can be worn TOGETHER.

Why? Because once it gets even a little warm I like to wear short sleeves, but sometimes my hands get cold. Now that I have two different pairs of very snug gauntlets, I can keep my hands warm. ;)


The real priority to the solid base and the lattice second pair was so that you could see both, of course!


All in all, they don't look quite as good together as I'd hoped, but I'm satisfied enough with both individually that I have no complaints. I mean, I made two pairs of gauntlets and ended up with three different looks! And suitable for three different types of weather.

Now I just have to figure out if I can see how to make them easily resizeable, and thus suitable for publication as patterns... :)

Join Wonder Why Gal for Fiber Arts Friday and Tami's Ami Blog for Finished Object Friday! See all the awesome stuff everyone else has been working on!! :)

Wednesday, February 9, 2011

Free Pattern of the Month: How to Crochet a Pyramid!

So, I'm a gamer. I won't go in to detail on what that means here - I play Dungeons and Dragons and numerous other games, is the short version, as well as board games. I suffer from one of the normal side effects of this particular hobby: I love dice.


What's not to love? They're colorful and useful at the same time!


See how pretty they are?

Last week, I was lying in bed and I was struck by an idea: I'd like to crochet a four-sided die! (from now on called only a d4)


d4's are the bane of the gamer. Just look at them! They're so pointy! If you drop one in the carpet, you're in big trouble! Stepping on one hurts like crazy. That's why my friends and I took to calling them "caltrops." I firmly believe that a field strewn with d4 would stop an army.

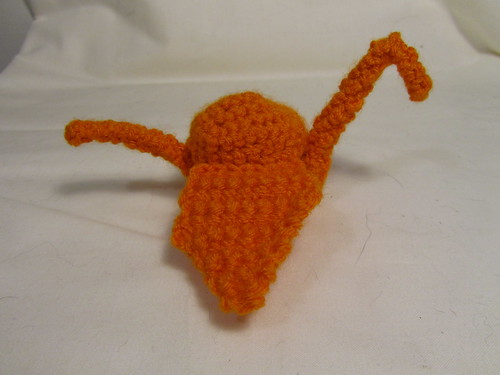
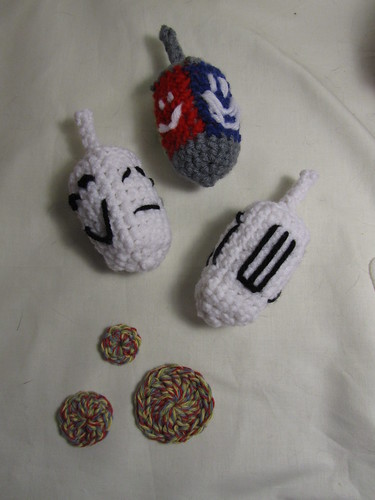
So I had this vision...a vision of an ouchless d4.


This free pattern will give you instructions on how to make your very own ouchless d4 (or pyramid, if you'd prefer). One of the coolest things about this pattern is that it can easily be modified to make a pyramid of different sizes!

Abbreviations: Note that this pattern uses US definitions.
Ch – chain
Sc – single crochet
Ss – slip stitch

All pyramids are done with a crochet hook, size G (4 mm).

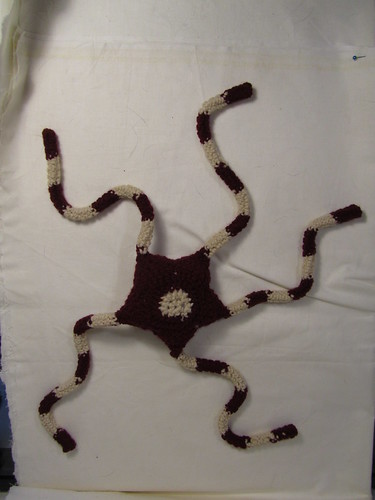
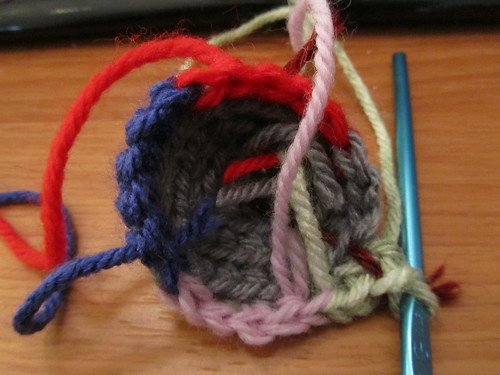
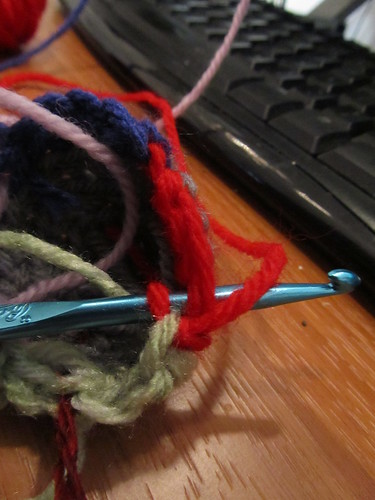
Lets start with the small pink one.


Round 1: Ch 4. Join.

Round 2: 3 sc in each of the next 3 ch, sc in next ch. Do not join. Place marker: 10 sc

Round 3: Sc in next sc, 3 sc in next sc, sc in next 2 sc, 3 sc in next sc, sc in next 2 sc, 3 sc in next sc, sc in next 2 sc: 16 sc

Round 4: Sc in next 2 sc, 3 sc in next sc, sc in next 4 sc, 3 sc in next sc, sc in next 4 sc, 3 sc in next sc, sc in next 3 sc: 22 sc

Round 5: Sc in next 3 sc, 3 sc in next sc, sc in next 6 sc, 3 sc in next sc, sc in next 6 sc, 3 sc in next sc, sc in next 4 sc: 28 sc

Round 6: Sc in next 4 sc, 3 sc in next sc, sc in next 8 sc, 3 sc in next sc, sc in next 8 sc, 3 sc in next sc, sc in next 5 sc: 34 sc

Round 7: Sc in next 5 sc, 3 sc in next sc, sc in next 10 sc, 3 sc in next sc, sc in next 10 sc, 3 sc in next sc, sc in next 6 sc: 40 sc

Round 8: Sc in next 6 sc, 3 sc in next sc, sc in next 12 sc, 3 sc in next sc, sc in next 12 sc, 2 sc in next sc, sc in next 7 sc: 45 sc

Round 9: Sc in next 5 sc, decrease three times, sc in next 9 sc, decrease three times, sc in next 9 sc, decrease three times, sc in next 4 sc: 36 sc

Round 10: Sc in next 3 sc, decrease three times, sc in next 6 sc, decrease three times, sc in next 6 sc, decrease three times, sc in next 3 sc: 27 sc

Round 11: Sc in next 2 sc, decrease three times, sc in next 3 sc, decrease three times, sc in next 3 sc, decrease three times, sc in next 1 sc: 18 sc

Round 12: Decrease around: 9 sc

Stuff with fiberfill.

Round 13: Decrease around. In last sc of previous round, ss, tighten and finish off.
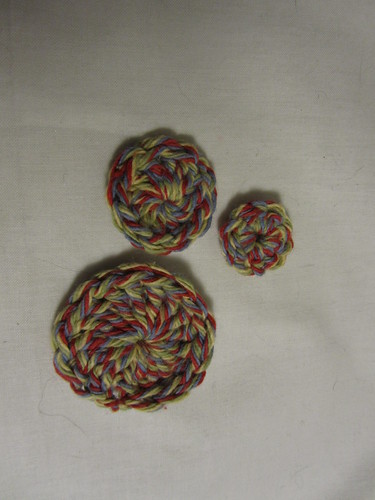
...and you're done!

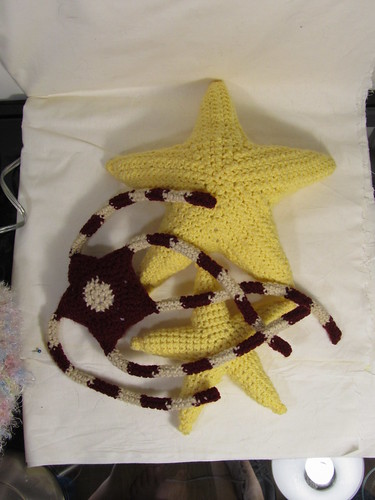
The beautiful thing about this is that you can modify it to be any size!

Each increase round proceeds in the following pattern:

Round 9: Sc in next 7 sc, 3 sc in next sc, sc in next 14 sc, 3 sc in next sc, sc in next 14 sc, 3 sc in next sc, sc in next 8 sc: 52 sc

Round 10: Sc in next 8 sc, 3 sc in next sc, sc in next 16 sc, 3 sc in next sc, sc in next 16 sc, 3 sc in next sc, sc in next 9 sc: 58 sc

Round 11: Sc in next 9 sc, 3 sc in next sc, sc in next 18 sc, 3 sc in next sc, sc in next 18 sc, 3 sc in next sc, sc in next 10 sc: 64 sc

Round 12: Sc in next 10 sc, 3 sc in next sc, sc in next 20 sc, 3 sc in next sc, sc in next 20 sc, 3 sc in next sc, sc in next 11 sc: 70 sc

Round 13: Sc in next 11 sc, 3 sc in next sc, sc in next 22 sc, 3 sc in next sc, sc in next 22 sc, 3 sc in next sc, sc in next 12 sc: 76 sc

...etc. Whichever round you decide to make your last, replace the last (3 sc in next sc) with (2 sc in next sc).

The decrease rounds are a little harder, and will require some calculations. You take the number of sc in the last increasing round. Subtract 18 from this number, then divide by 3. The result will be the number of sc on each side of the pyramid. So, for example, if Round 13 just above was our last increasing round, you would have 75 sc (because you have replaced the last (3 sc in next sc) with (2 sc in next sc) ). 75 minus 18 equals 57. 57 divided by 3 is 19. Thus, the instructions for the next round would be:

Round 14: Sc in next 10 sc, decrease three times, sc in next 19 sc, decrease three times, sc in next 19 sc, decrease three times, sc in next 9 sc: 66 sc

For each subsequent decreasing round, subtract 3 sc per side (9 sc per round). To continue with the example, you would proceed as follows:

Round 15: Sc in next 8 sc, decrease three times, sc in next 16 sc, decrease three times, sc in next 16 sc, decrease three times, sc in next 8 sc: 57 sc

Round 16: Sc in next 7 sc, decrease three times, sc in next 13 sc, decrease three times, sc in next 13 sc, decrease three times, sc in next 6 sc: 48 sc

Round 17: Sc in next 5 sc, decrease three times, sc in next 10 sc, decrease three times, sc in next 10 sc, decrease three times, sc in next 5 sc: 39 sc

Round 18: Sc in next 4 sc, decrease three times, sc in next 7 sc, decrease three times, sc in next 7 sc, decrease three times, sc in next 3 sc: 30 sc

Round 19: Sc in next 2 sc, decrease three times, sc in next 4 sc, decrease three times, sc in next 4 sc, decrease three times, sc in next 2 sc: 21 sc

Round 20: Sc in next sc, decrease three times, sc in next sc, decrease three times, sc in next sc, decrease three times: 12 sc

Round 21: Decrease around: 6 sc

Calculating the decreasing is definitely more difficult than calculating the increases, so lets do another example:


This is a d4/pyramid which has sides of 20 sc at the widest part. First, you do the increasing rounds:

Round 1: Ch 4. Join.

Round 2: 3 sc in next 3 ch, sc in next ch. Place marker: 13 sc

Round 3: Sc in next sc, 3 sc in next sc, sc in next 2 sc, 3 sc in next sc, sc in next 2 sc, 3 sc in next sc, sc in next 2 sc: 16 sc

Round 4: Sc in next 2 sc, 3 sc in next sc, sc in next 4 sc, 3 sc in next sc, sc in next 4 sc, 3 sc in next sc, sc in next 3 sc: 22 sc

Round 5: Sc in next 3 sc, 3 sc in next sc, sc in next 6 sc, 3 sc in next sc, sc in next 6 sc, 3 sc in next sc, sc in next 4 sc: 28 sc

Round 6: Sc in next 4 sc, 3 sc in next sc, sc in next 8 sc, 3 sc in next sc, sc in next 8 sc, 3 sc in next sc, sc in next 5 sc: 34 sc

Round 7: Sc in next 5 sc, 3 sc in next sc, sc in next 10 sc, 3 sc in next sc, sc in next 10 sc, 3 sc in next sc, sc in next 6 sc: 40 sc

Round 8: Sc in next 6 sc, 3 sc in next sc, sc in next 12 sc, 3 sc in next sc, sc in next 12 sc, 3 sc in next sc, sc in next 7 sc: 46 sc

Round 9: Sc in next 7 sc, 3 sc in next sc, sc in next 14 sc, 3 sc in next sc, sc in next 14 sc, 3 sc in next sc, sc in next 8 sc: 52 sc

Round 10: Sc in next 8 sc, 3 sc in next sc, sc in next 16 sc, 3 sc in next sc, sc in next 16 sc, 3 sc in next sc, sc in next 9 sc: 58 sc

Round 11: Sc in next 9 sc, 3 sc in next sc, sc in next 18 sc, 3 sc in next sc, sc in next 18 sc, 3 sc in next sc, sc in next 10 sc: 64 sc

Round 12: Sc in next 10 sc, 3 sc in next sc, sc in next 20 sc, 3 sc in next sc, sc in next 20 sc, 2 sc in next sc, sc in next 11 sc: 69 sc

(remember - in round 12, replace the last 3 sc with a 2 sc in next sc!)

Then, you decrease. Calculate the length of each side in the next round: 69 sc minus 18 sc is 51 sc; divided by 3 is 17 sc per side. Thus, we can figure out the next round as follows:

Round 13: Sc in next 9 sc, decrease three times, sc in next 17 sc, decrease three times, sc in next 17 sc, decrease three times, sc in next 8 sc: 60 sc

Then, just figure out each subsequent round by subtracting 3 sc from each side of the pyramid:

Round 14: Sc in next 7 sc, decrease three times, sc in next 14 sc, decrease three times, sc in next 14 sc, decrease three times, sc in next 7 sc: 51 sc

Round 15: Sc in next 6 sc, decrease three times, sc in next 11 sc, decrease three times, sc in next 11 sc, decrease three times, sc in next 5 sc: 42 sc

Round 16: Sc in next 4 sc, decrease three times, sc in next 8 sc, decrease three times, sc in next 8 sc, decrease three times, sc in next 4 sc: 33 sc

Round 17: Sc in next 3 sc, decrease three times, sc in next 5 sc, decrease three times, sc in next 5 sc, decrease three times, sc in next 2 sc: 24 sc

Round 18: Sc in next 1 sc, decrease three times, sc in next 2 sc, decrease three times, sc in next 2 sc, decrease three times, sc in next 1 sc: 15 sc

Stuff with fiberfill.

Round 19: Decrease around, sc in last sc: 8 sc

Round 20: Decrease around, ss in last sc, tighten and finish off: 4 sc


You can download a PDF of this pattern from Ravelry. I don't think you need an account to do so: download now!

If you have any trouble at all, feel free to drop me an e-mail at unforth@yahoo.com, or comment here, or message me on Ravelry (user name Unforth)...or whatever. :)

Wednesday, December 1, 2010

Eight Days of Hanukkah Crochet-A-Long

I have been inspired by my fellow amigurumi makers to turn my little dreidel pattern in to a Crochet-A-Long.

Hey, Claire, what's a Crochet-A-Long?
That was my question, and the answers I got made it sound like fun! A crochet-a-long is when a designer, like me, says, "hey, everyone, lets all make a pattern together, and when we're all done, we can see all the awesome ways we interpreted it and all the things that we all did!"

Oh, that sounds fun! How do I participate?
It's really easy! Yesterday, I posted a free pattern to make an amigurumi dreidel and gelt in honor of Hanukkah, which starts tonight. It's a quick pattern - in an hour and a half, I made two entire dreidels and some of the gelt - and can be done using scraps - the finished product is about 4 1/2 inches tall and 2 inches wide. And when you're done, you can actually sort of play dreidel with it! :)

A what and what?
A dreidel and gelt! A dreidel is a four-sided spinning top used to play a gambling game, and the gelt is what you gamble for. The links will take you to wiki for more information, including a standard version of the rules, but here's how I learned to play as a girl (it's slightly different). First, you spin the dreidel. A traditionally dreidel has one of four Hebrew characters on the sides, and you'll get one of the four as your result when you spin the dreidel: gimmel, hey, nun and shin. If you get gimmel, you get all of the gelt in the pot. If you get a hey, you get half of the pot. If you get nun, nothing happens, and if you get shin, you lose all of your gelt! But never fear, because it's nothing all that valuable - we always played for either pennies, candies - especially M&Ms, or for true "gelt" - those chocolates wrapped in gold to look like coins and sold in little net bags. Whenever candy was involved, eating your stash was entirely allowed, so generally the game ended when all the candy had gotten eaten. :) However, if you want to play, I suggest you use wikipedia's rules rather than mine, because the ones we used when I was a kid are a little dysfunctional (all that "take all the pot! lose all your gelt!" makes for a lot of back and forth. Until you eat it...)

Here's what you'll be making.


To join the Crochet-A-Long:

Step 1: Get the pattern! You can either:
a. Copy it from the blog post about it
b. Download it from Ravelry: download now
c. E-mail me at unforth (AT) yahoo (DOT) com, subject "Hanukkah Crochet-A-Long," and I can send it to you as a PDF attachment.

Step 2: Make the pattern! Have fun! Use scraps! Make crazy faces on the four sides to represent gimmel, hey, nun and shin!

Step 3: Share what you've made! Post your pics on Ravelry, upload them to the Curiously Crafted Creations Facebook page, share them on Flickr or Photobucket or whatnot (and send or post the link), or just e-mail them to me at unforth (AT) yahoo (DOT) com. Once I've got permission from folks to use their pics, I'll share them right here on my blog!

Step 4: PROFIT! As a prize, I will select 1 lucky person who participates in the CAL to receive their choice of one of my other patterns for free!

To be included in the lotto, finish your dreidel by the end of the Festival of Lights - that's December 9th! I know, not much time, but it's a short pattern, promise.

Once again, Happy Hanukkah, everyone! :)

Tuesday, November 30, 2010

Celebrate Hanukkah with a Free Amigurumi Pattern!

Only somewhat known fact about me: I'm Jewish! And one of my favorite holidays of the year is Hanukkah. I've already got my menorah and candles all ready for tomorrow, and I'm pondering potato latkes and gelt. While these things wandered through my brain on Sunday morning, I had a moment of insight - a design for a cute little amigurumi dreidel. Cause really, Hanukkah ain't complete without a dreidel!

Here's how to make your own! Note that I've made this pattern three times, so I know it works, but I've not had it tested by any other person, so there is a chance it'll be a little confusing. If you have any trouble, just let me know!! :) Also, here are two links that helped me design this: How to Crochet a Cube and Magic Adjustable Ring Tutorial.

Make your own dreidel!


If you want to make it in one color, just ignore all the color switch instructions. I encourage you to use colors, though - this pattern is a great way to use some scraps!

Materials:
Small amount of worsted weight yarn
Size G crochet hook (4.0 mm)
Yarn needle
Fiberfill

Abbreviations:
Ch - Chain
Dc - Double crochet
Sc - Single crochet
Ss - Slip stitch
Tc - Triple crochet

Main part of the dreidel:
Start in color 1.
Round 1: Ch 2. 4 sc in second ch from hook. Do not join. Place marker: 4 sc

Round 2: (3 sc in next sc) around: 12 sc

Round 3: Sc in next sc, (3 sc in next sc, sc in next 2 sc) 3 times, 3 sc in next sc, sc in next sc: 20 sc

Round 4: Sc around: 20 sc

Round 5: Sc in next 2 sc in first color. Switch to your second color. Sc in next 5 sc. Tie on your third color but DO NOT CUT your second color off. With the third color, sc in next 5 sc. Tie on the fourth color but do not cut your third color off. With the fourth color, sc in next 5 sc. Tie on the fifth color but do not cut your fourth color off. With the fifth color, sc in next 3 sc: 20 sc

Here's what Round 5 should more or less look like once your done:


Round 6: Continuing with your fifth color, sc in next 2 sc. Switch back to your second color. To do this, lay the yarn along the color 2 crocheted stitches from the previous round, and as you work your sc, work around both the normal loop and the "loose" length. If you're confused, I've attempted to take a picture of this process (just below). No idea if it's clear or helpful, but I tried. :) Using your second color, sc in next 5 sc. You'll be using this procedure to switch colors each time from now on. With third color, sc in next 5 sc. With fourth color, sc in next 5 sc. With fifth color, sc in next 3 sc: 20 sc

Here's my attempt to photograph what you're doing when you carry over the colors to a new round:


Rounds 7 - 10: With color five, sc in next 2 sc. With color two, sc in next 5 sc. With color three, sc in next 5 sc. With color four, sc in next 5 sc. With color five, sc in next 3 sc: 20 sc

Round 11: With color five, sc in next 2 sc. With color two, sc in next 5 sc. Cut the second color, and carefully tie the loose end to color three before you continue. With color three, sc in next 5 sc. Cut the third color, and carefully tie the loose end to color four before you continue. With color four, sc in next 5 sc. Cut the fourth color, and carefully tie the loose end to color five before you continue. With color five, sc in next 3 sc: 20 sc

Sc in next 2 sc, ss in next st, tighten in finish off.

Next, make the top of the dreidel:
In first color.
Row 1: Ch 6. Starting in second ch from hook, sc in next 5 ch: 5 sc

Rows 2 - 5: Ch 1 (turning ch). Sc in next 5 sc: 5 sc

Ch 1, tighten, and finish off. Leave a long end for sewing.

Stuff the base of the dreidel with fiber fill, then sew the top over the top. Make sure you line up the corners of the square top with the color transitions on the dreidel (or, if only using one color, that your corners line up with the corners at the base). When you've got three sides sewn on, stuff in a bit more fiberfill. Don't over stuff, though - make sure the top stays (relatively) flat, instead of puffing out.

Handle:
Ch 2. In second ch from hook, sc 3 times. From there, work in a 3 sc spiral until it's one inch long. Ss in next sc, tighten and leave a long end for sewing.

Sew the handle on to the center of the dreidel top.

Next, you can decorate your four sides with images that reflect the four sides of a dreidel - the key to how you play the game. First, here are the rules on Wikipedia. Now, the way I learned - which is a little different, is as follows. Dreidel is a gambling game, and you start with a pool of something to gamble with - for us, it was always either pennies, candies (like M&Ms), or gelt (that chocolate wrapped in gold foil that looks like coins). There are four sides on the dreidel, represented by the Hebrew letters gimmel, hey, nun and shin. Which of these turns up determines what happens. If you spin a gimmel, you get the entire pot. This is the best result. If you spin a hey, you get half of the pot. This is the second best result. If you spin a nun, nothing happens. This is a neutral result. And if you spin a shin, you lose your entire stash. This is the worst result! Now, if you're gonna play, I suggest you use wiki's rules, they're more functional, but mine get the idea across: four possible results, one awesome, one okay, one neutral, and one lousy. I thought it would be fun to represent this with different looking smiley faces. I also made one dreidel with the traditional symbols. Consider these pictures to be some ideas on how to decorate yours - but feel free to have fun with it and use whatever random embroidery stitches you might know!!

Gimmel:


Hey:


Nun:


Shin:


Now that you've made your dreidel, though, you need something to gamble for! How about...some amigurumi gelt? Of course!


Small gelt:
10 sc magic circle. Join with a ss, tighten and finish off.

Medium gelt:
12 dc magic circle. Join with a ss, tighten and finish off.

Large felt:
16 tc magic circle. Join with a ss, tighten and finish off.

I tested my dreidel, and it kinda works...it has a tendency to not land flatly on a side, but it will spin if you hold it close to the base! Now, if only I had someone to play dreidel with...


Happy Hanukkah, everyone!!! :)