Only somewhat known fact about me: I'm Jewish! And one of my favorite holidays of the year is Hanukkah. I've already got my menorah and candles all ready for tomorrow, and I'm pondering potato latkes and gelt. While these things wandered through my brain on Sunday morning, I had a moment of insight - a design for a cute little amigurumi dreidel. Cause really, Hanukkah ain't complete without a dreidel!
Here's how to make your own! Note that I've made this pattern three times, so I know it works, but I've not had it tested by any other person, so there is a chance it'll be a little confusing. If you have any trouble, just let me know!! :) Also, here are two links that helped me design this:
How to Crochet a Cube and
Magic Adjustable Ring Tutorial.
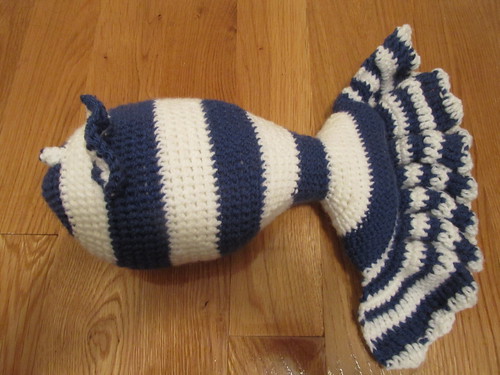
Make your own dreidel!
If you want to make it in one color, just ignore all the color switch instructions. I encourage you to use colors, though - this pattern is a great way to use some scraps!
Materials:
Small amount of worsted weight yarn
Size G crochet hook (4.0 mm)
Yarn needle
Fiberfill
Abbreviations:
Ch - Chain
Dc - Double crochet
Sc - Single crochet
Ss - Slip stitch
Tc - Triple crochet
Main part of the dreidel:
Start in color 1.
Round 1: Ch 2. 4 sc in second ch from hook. Do not join. Place marker: 4 sc
Round 2: (3 sc in next sc) around: 12 sc
Round 3: Sc in next sc, (3 sc in next sc, sc in next 2 sc) 3 times, 3 sc in next sc, sc in next sc: 20 sc
Round 4: Sc around: 20 sc
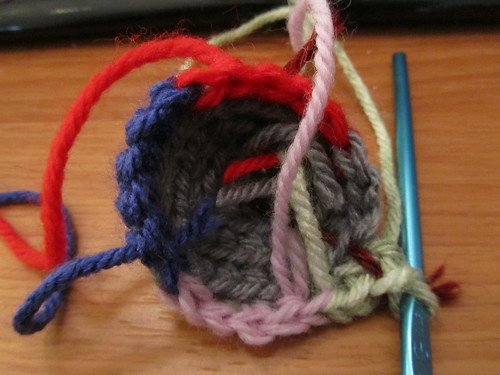
Round 5: Sc in next 2 sc in first color. Switch to your second color. Sc in next 5 sc. Tie on your third color but DO NOT CUT your second color off. With the third color, sc in next 5 sc. Tie on the fourth color but do not cut your third color off. With the fourth color, sc in next 5 sc. Tie on the fifth color but do not cut your fourth color off. With the fifth color, sc in next 3 sc: 20 sc
Here's what Round 5 should more or less look like once your done:
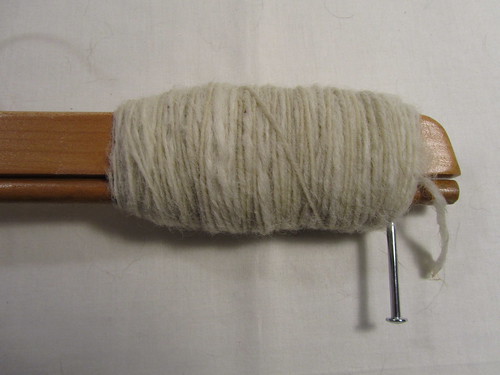
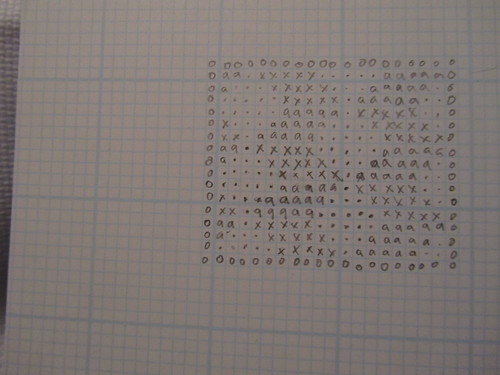
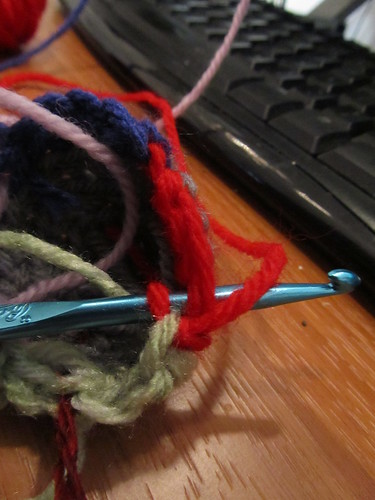
Round 6: Continuing with your fifth color, sc in next 2 sc. Switch back to your second color. To do this, lay the yarn along the color 2 crocheted stitches from the previous round, and as you work your sc, work around both the normal loop and the "loose" length. If you're confused, I've attempted to take a picture of this process (just below). No idea if it's clear or helpful, but I tried. :) Using your second color, sc in next 5 sc. You'll be using this procedure to switch colors each time from now on. With third color, sc in next 5 sc. With fourth color, sc in next 5 sc. With fifth color, sc in next 3 sc: 20 sc
Here's my attempt to photograph what you're doing when you carry over the colors to a new round:
Rounds 7 - 10: With color five, sc in next 2 sc. With color two, sc in next 5 sc. With color three, sc in next 5 sc. With color four, sc in next 5 sc. With color five, sc in next 3 sc: 20 sc
Round 11: With color five, sc in next 2 sc. With color two, sc in next 5 sc. Cut the second color, and carefully tie the loose end to color three before you continue. With color three, sc in next 5 sc. Cut the third color, and carefully tie the loose end to color four before you continue. With color four, sc in next 5 sc. Cut the fourth color, and carefully tie the loose end to color five before you continue. With color five, sc in next 3 sc: 20 sc
Sc in next 2 sc, ss in next st, tighten in finish off.
Next, make the top of the dreidel:
In first color.
Row 1: Ch 6. Starting in second ch from hook, sc in next 5 ch: 5 sc
Rows 2 - 5: Ch 1 (turning ch). Sc in next 5 sc: 5 sc
Ch 1, tighten, and finish off. Leave a long end for sewing.
Stuff the base of the dreidel with fiber fill, then sew the top over the top. Make sure you line up the corners of the square top with the color transitions on the dreidel (or, if only using one color, that your corners line up with the corners at the base). When you've got three sides sewn on, stuff in a bit more fiberfill. Don't over stuff, though - make sure the top stays (relatively) flat, instead of puffing out.
Handle:
Ch 2. In second ch from hook, sc 3 times. From there, work in a 3 sc spiral until it's one inch long. Ss in next sc, tighten and leave a long end for sewing.
Sew the handle on to the center of the dreidel top.
Next, you can decorate your four sides with images that reflect the four sides of a dreidel - the key to how you play the game. First,
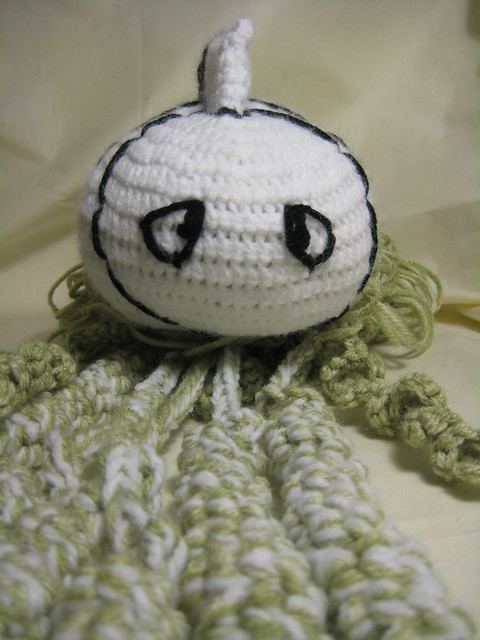
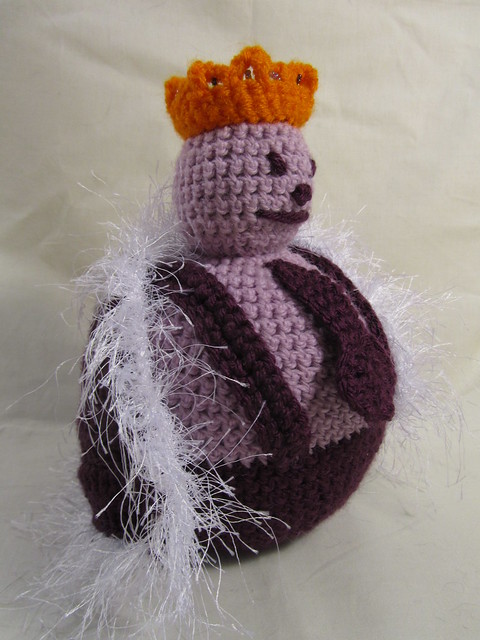
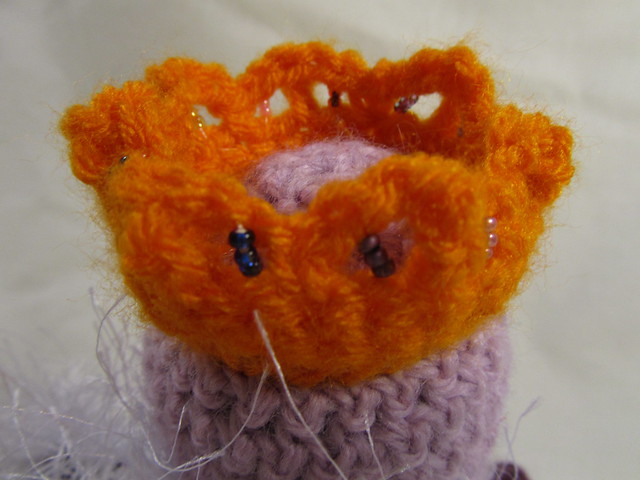
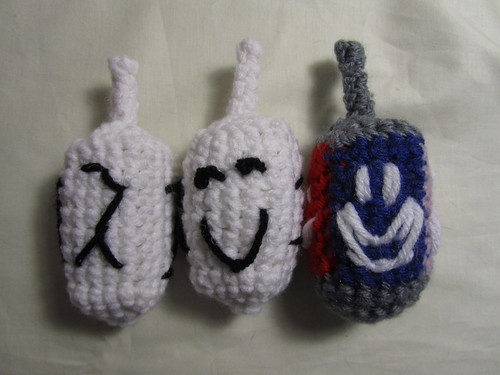
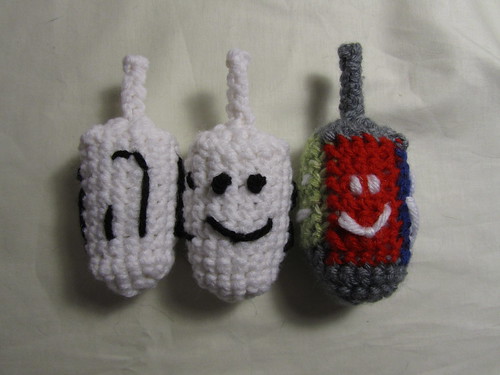
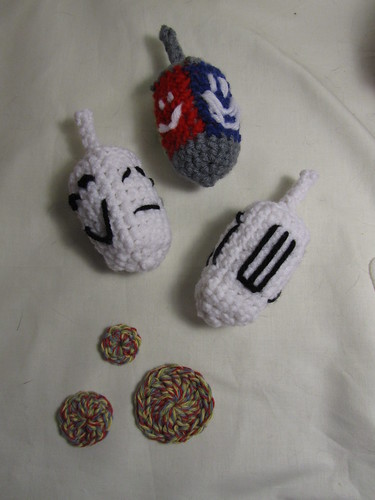
here are the rules on Wikipedia. Now, the way I learned - which is a little different, is as follows. Dreidel is a gambling game, and you start with a pool of something to gamble with - for us, it was always either pennies, candies (like M&Ms), or gelt (that chocolate wrapped in gold foil that looks like coins). There are four sides on the dreidel, represented by the Hebrew letters gimmel, hey, nun and shin. Which of these turns up determines what happens. If you spin a gimmel, you get the entire pot. This is the best result. If you spin a hey, you get half of the pot. This is the second best result. If you spin a nun, nothing happens. This is a neutral result. And if you spin a shin, you lose your entire stash. This is the worst result! Now, if you're gonna play, I suggest you use wiki's rules, they're more functional, but mine get the idea across: four possible results, one awesome, one okay, one neutral, and one lousy. I thought it would be fun to represent this with different looking smiley faces. I also made one dreidel with the traditional symbols. Consider these pictures to be some ideas on how to decorate yours - but feel free to have fun with it and use whatever random embroidery stitches you might know!!
Gimmel:
Hey:
Nun:
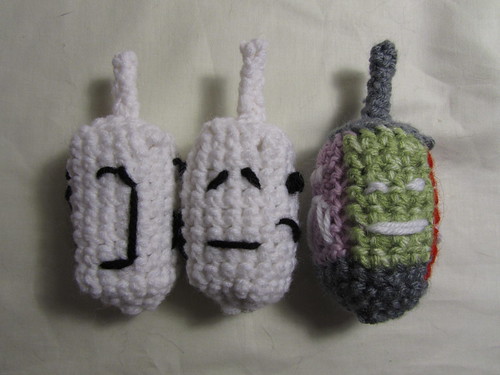
Shin:

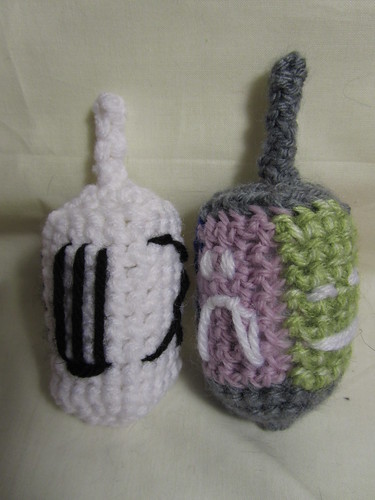
Now that you've made your dreidel, though, you need something to gamble for! How about...some amigurumi gelt? Of course!
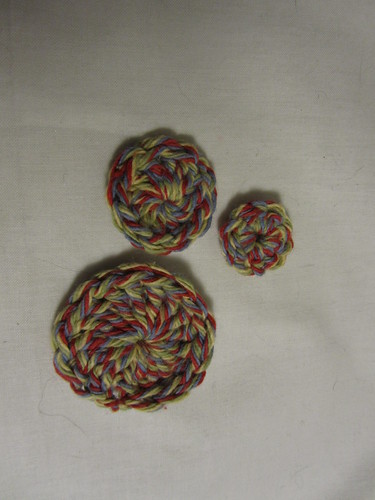
Small gelt:
10 sc magic circle. Join with a ss, tighten and finish off.
Medium gelt:
12 dc magic circle. Join with a ss, tighten and finish off.
Large felt:
16 tc magic circle. Join with a ss, tighten and finish off.
I tested my dreidel, and it kinda works...it has a tendency to not land flatly on a side, but it will spin if you hold it close to the base! Now, if only I had someone to play dreidel with...
Happy Hanukkah, everyone!!! :)