Tuesday, November 30, 2010

Celebrate Hanukkah with a Free Amigurumi Pattern!

Only somewhat known fact about me: I'm Jewish! And one of my favorite holidays of the year is Hanukkah. I've already got my menorah and candles all ready for tomorrow, and I'm pondering potato latkes and gelt. While these things wandered through my brain on Sunday morning, I had a moment of insight - a design for a cute little amigurumi dreidel. Cause really, Hanukkah ain't complete without a dreidel!

Here's how to make your own! Note that I've made this pattern three times, so I know it works, but I've not had it tested by any other person, so there is a chance it'll be a little confusing. If you have any trouble, just let me know!! :) Also, here are two links that helped me design this: How to Crochet a Cube and Magic Adjustable Ring Tutorial.

Make your own dreidel!
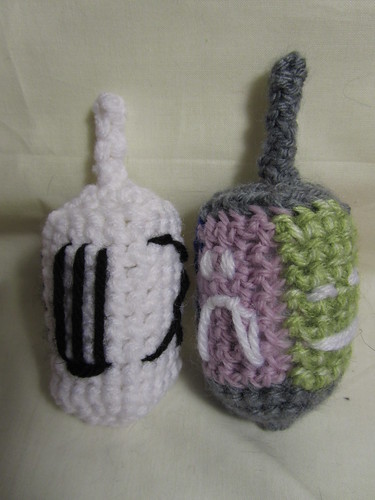


If you want to make it in one color, just ignore all the color switch instructions. I encourage you to use colors, though - this pattern is a great way to use some scraps!

Materials:
Small amount of worsted weight yarn
Size G crochet hook (4.0 mm)
Yarn needle
Fiberfill

Abbreviations:
Ch - Chain
Dc - Double crochet
Sc - Single crochet
Ss - Slip stitch
Tc - Triple crochet

Main part of the dreidel:
Start in color 1.
Round 1: Ch 2. 4 sc in second ch from hook. Do not join. Place marker: 4 sc

Round 2: (3 sc in next sc) around: 12 sc

Round 3: Sc in next sc, (3 sc in next sc, sc in next 2 sc) 3 times, 3 sc in next sc, sc in next sc: 20 sc

Round 4: Sc around: 20 sc

Round 5: Sc in next 2 sc in first color. Switch to your second color. Sc in next 5 sc. Tie on your third color but DO NOT CUT your second color off. With the third color, sc in next 5 sc. Tie on the fourth color but do not cut your third color off. With the fourth color, sc in next 5 sc. Tie on the fifth color but do not cut your fourth color off. With the fifth color, sc in next 3 sc: 20 sc

Here's what Round 5 should more or less look like once your done:
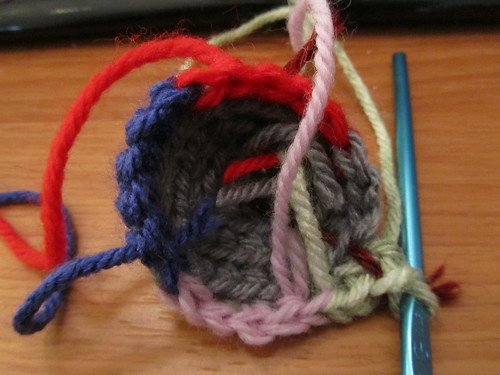

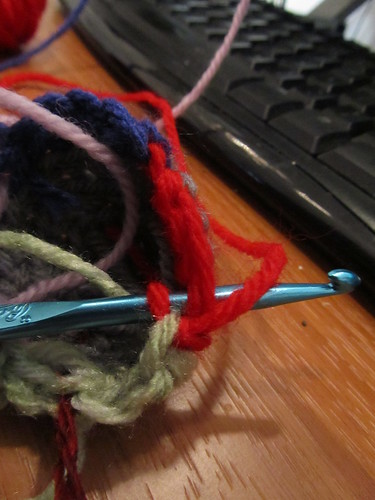
Round 6: Continuing with your fifth color, sc in next 2 sc. Switch back to your second color. To do this, lay the yarn along the color 2 crocheted stitches from the previous round, and as you work your sc, work around both the normal loop and the "loose" length. If you're confused, I've attempted to take a picture of this process (just below). No idea if it's clear or helpful, but I tried. :) Using your second color, sc in next 5 sc. You'll be using this procedure to switch colors each time from now on. With third color, sc in next 5 sc. With fourth color, sc in next 5 sc. With fifth color, sc in next 3 sc: 20 sc

Here's my attempt to photograph what you're doing when you carry over the colors to a new round:

Rounds 7 - 10: With color five, sc in next 2 sc. With color two, sc in next 5 sc. With color three, sc in next 5 sc. With color four, sc in next 5 sc. With color five, sc in next 3 sc: 20 sc

Round 11: With color five, sc in next 2 sc. With color two, sc in next 5 sc. Cut the second color, and carefully tie the loose end to color three before you continue. With color three, sc in next 5 sc. Cut the third color, and carefully tie the loose end to color four before you continue. With color four, sc in next 5 sc. Cut the fourth color, and carefully tie the loose end to color five before you continue. With color five, sc in next 3 sc: 20 sc

Sc in next 2 sc, ss in next st, tighten in finish off.

Next, make the top of the dreidel:
In first color.
Row 1: Ch 6. Starting in second ch from hook, sc in next 5 ch: 5 sc

Rows 2 - 5: Ch 1 (turning ch). Sc in next 5 sc: 5 sc

Ch 1, tighten, and finish off. Leave a long end for sewing.

Stuff the base of the dreidel with fiber fill, then sew the top over the top. Make sure you line up the corners of the square top with the color transitions on the dreidel (or, if only using one color, that your corners line up with the corners at the base). When you've got three sides sewn on, stuff in a bit more fiberfill. Don't over stuff, though - make sure the top stays (relatively) flat, instead of puffing out.

Handle:
Ch 2. In second ch from hook, sc 3 times. From there, work in a 3 sc spiral until it's one inch long. Ss in next sc, tighten and leave a long end for sewing.

Sew the handle on to the center of the dreidel top.

Next, you can decorate your four sides with images that reflect the four sides of a dreidel - the key to how you play the game. First, here are the rules on Wikipedia. Now, the way I learned - which is a little different, is as follows. Dreidel is a gambling game, and you start with a pool of something to gamble with - for us, it was always either pennies, candies (like M&Ms), or gelt (that chocolate wrapped in gold foil that looks like coins). There are four sides on the dreidel, represented by the Hebrew letters gimmel, hey, nun and shin. Which of these turns up determines what happens. If you spin a gimmel, you get the entire pot. This is the best result. If you spin a hey, you get half of the pot. This is the second best result. If you spin a nun, nothing happens. This is a neutral result. And if you spin a shin, you lose your entire stash. This is the worst result! Now, if you're gonna play, I suggest you use wiki's rules, they're more functional, but mine get the idea across: four possible results, one awesome, one okay, one neutral, and one lousy. I thought it would be fun to represent this with different looking smiley faces. I also made one dreidel with the traditional symbols. Consider these pictures to be some ideas on how to decorate yours - but feel free to have fun with it and use whatever random embroidery stitches you might know!!

Gimmel:
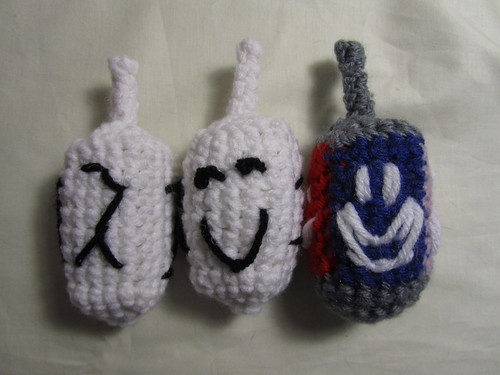

Hey:
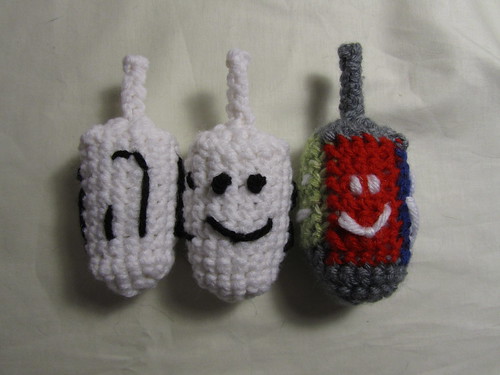

Nun:
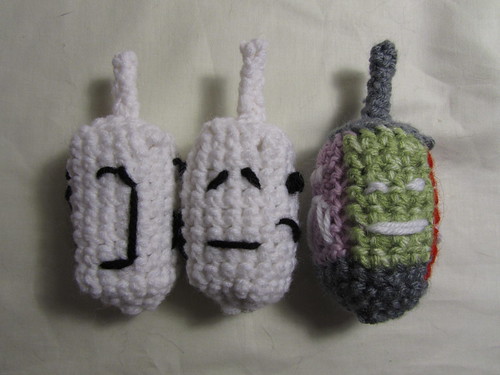

Shin:


Now that you've made your dreidel, though, you need something to gamble for! How about...some amigurumi gelt? Of course!
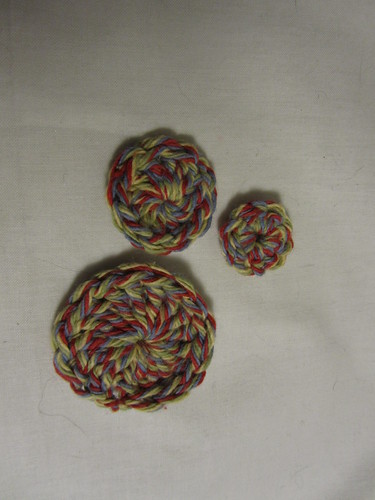


Small gelt:
10 sc magic circle. Join with a ss, tighten and finish off.

Medium gelt:
12 dc magic circle. Join with a ss, tighten and finish off.

Large felt:
16 tc magic circle. Join with a ss, tighten and finish off.

I tested my dreidel, and it kinda works...it has a tendency to not land flatly on a side, but it will spin if you hold it close to the base! Now, if only I had someone to play dreidel with...
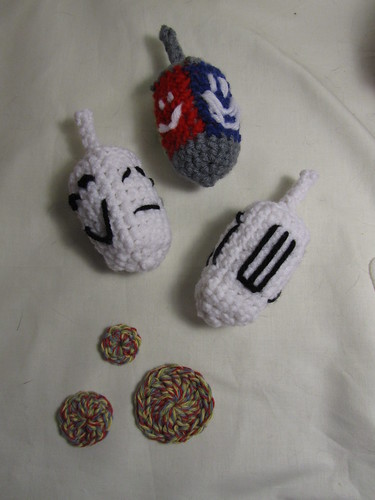


Happy Hanukkah, everyone!!! :)

Sunday, November 28, 2010

State of the Store Sunday - November 28, 2010

The last week or so, I've done a lot of general maintenance on my business, and rather than spam you all with continual updates, I thought I would just do one general update. Indeed, I like the idea of a "State of the Store" report, not as a weekly perhaps, but as an occasional post for when things have changed. Like now! Cause a LOT has changed!


For starters, after a fair amount of debate over what a banner should look like, Curiously Crafted Creations has a banner that I don't hate. I may change it in the future, but I think that it's important for an etsy store to have banner - I don't know, I just think it gets the page off on the right foot.

I also ordered business cards:


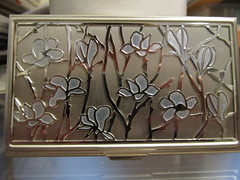
To celebrate this achievement, I bought a business card case that I've wanted ever since I saw it in 2008 - it's from the Met, and shows a Tiffany pattern:


I re-listed all of the cards that I had previously listed (they don't sell too well). This was a big debate for me. I mean, if I just keep sinking money in to this, it will demolish any chance that I'll make a profit. On the other hand, if my work isn't out there, obviously it's never going to sell. Thus, I decided to just go for it. In the end it's a difference of only a few dollars. Thus, there were a decent collection of photos up (four sold yesterday, unusually enough! :) ) going in to today. I augmented this today by listing the first batch of cards suitable for use as Christmas cards. I knew I had to get these up ASAP if they were to be of any use as a pre-Christmas item to sell. So if you have any interest in Christmas cards, you should wander over and see what's up! I also created a "deal" - a "buy any 5 cards" option that shaves 15 cents off the price of each card (5 for $8 instead of 1 for $1.75). I'm planning to put a "10 for $15" deal up as well.
Speaking of a few dollars, I'm in the green again! I spotted a really good deal for printing a pile of photographs - 365 prints - for free if I spent $10. Of course, that was before shipping, so when all was said and done I spent almost $40, which more than ate up my old small profit margin. But the initial Christmas card commission (which I've now finished and shipped), an unexpected large purchase by a friend, and an unexpected commission for an amigurumi pattern (my first ever commission from a stranger!) has put me more solidly in the green than I've ever been. Which isn't saying much, we're still talking about a profit of less than $100, but I'll take it - it's better than having taken a loss! :) I'd have a larger profit if I was prepared to stop trying on the card front, but I'm not ready to do that. I KNOW I take nice photographs, and do good work, and I really do believe that if I keep at it, I can get somewhere selling them. :)
Meanwhile, the deal gave me a chance to conduct another experiment I've wanted to do for a while.

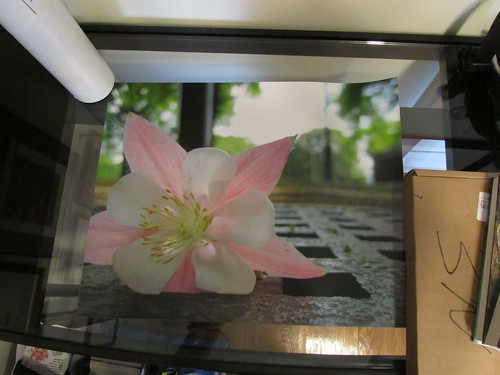
Cards are obviously not the only way of selling photography! However, I've been reluctant to offer the option for larger prints without running a test. Since I had to spend $10 anyway, I decided to pick out a photograph (one of my personal favorites) to print at a 16 x 20 size. It was $15 + shipping, a total of just under $20. It turned out both better and worse than I expected. It turned out better in that the image is nice and clear and crisp, and looks pretty much just like the original. Details that were not visible on a smaller medium, like the veins in the petals, are VERY clear. It turned out worse in that it showed every little imperfection. Two examples - neither visible in the photo above - are that there's a little black speck on one of the petals that is shockingly noticeable, I don't I'd ever have spotted it on the original if I wasn't looking for it, and the other is that it turns out the steeples (or whatever they're called) are a little out of focus, another thing I never would have noticed but is pretty easy to spot on the full size poster. So clearly if I'm going to do large prints I need to VERY carefully examine the original picture, and spend some time removing teeny imperfections like the black speck.
On Friday, I finished my experiment with pattern testing. I've been a member of the Free Pattern Testing group on Ravelry for a while, but always as a lurker. A couple weeks ago, I carefully reviewed all of their FAQs, rules, and policies, and I went for it, testing the Blub Blub pattern. I sought 5 testers, and provided them with the pattern, and awaited their feedback. I'm very glad I did this. It's proved a very beneficial experience. It firmly established that I wasn't actually criminally negligent when I didn't test any of my previous patterns - my testers didn't find a single error in my actual description of the doll, and agreed that my directions were very clear. What was lacking - and what I added - were some generalizations that helped the maker to figure out things that were slightly confusion. This was solved by the addition of a "tips" section, and a few other odds and ends (like page numbers!) and the result is that the Blub Blub pattern went live yesterday on Etsy and Ravelry. It's a lot of "firsts" wrapped in one - my first tested pattern, the first pattern with higher quality pics thanks to my "light box," and my first pattern released with a pattern. Then, just to top things off, I put Santana Squid up for testing, should be done in a couple of weeks. :)

I also listed both of the previously made Blub Blub dolls for sale. These are the first completed amigurumi I've ever actually listed on etsy - all the others I've sold were either commissions to begin with, or I get specific requests for them. No idea if this will work, but if it does, that'd be nice. :)

Hmm...what else? That might actually be it. And it's plenty! Lots going on - a commission and two gifts to make - listing things for sale - working away - and generally thinking about what I want out of this business and how I want to go about succeeding. Not bad for a few weeks work!

Saturday, November 27, 2010

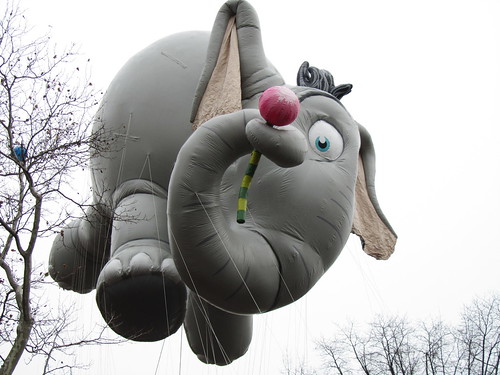
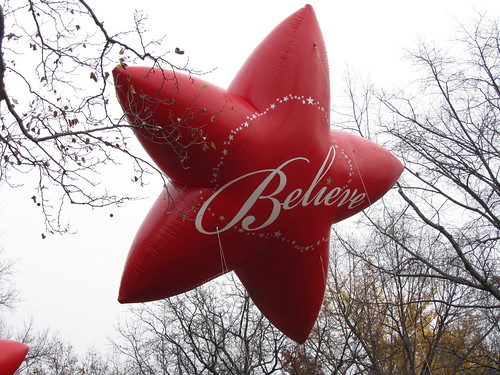
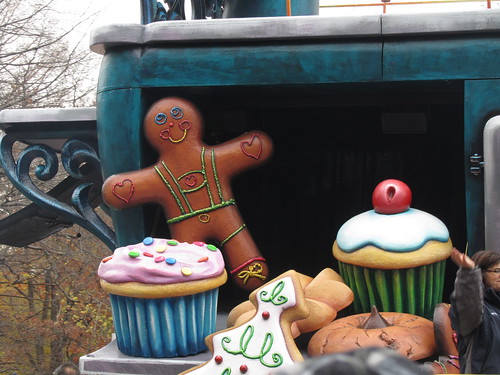
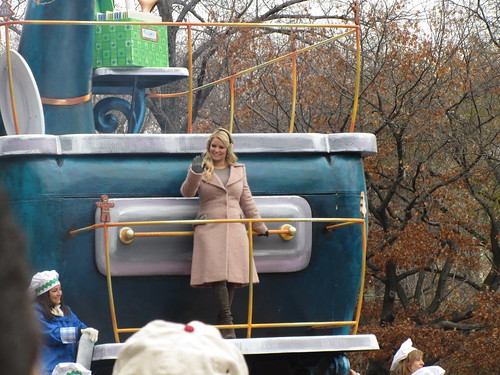
Macy's Thanksgiving Day Parade

I love holidays. I love celebrations. I love fireworks, and family get-togethers, and big crowds of happy people. Thus, it is not at all surprising that I love parades. Given my cold, and that the weather wasn't supposed to be very nice on Thursday, when I went to bed on Wednesday night I had already decided not to go to the Parade. It's so far downtown, I thought. What if it rains? What if I get sicker? What if it's not done til noon and I'm massively late for Thanksgiving dinner at 2? etc. etc.

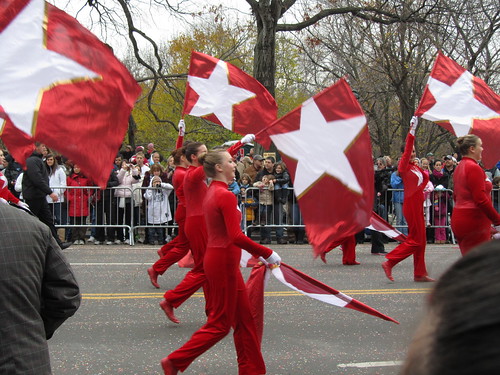
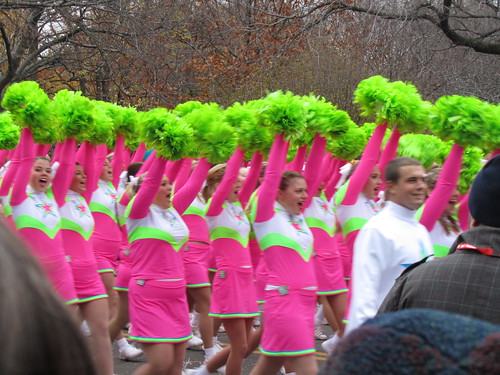
I woke up at 6:30 on Thursday morning and immediately tried to get back to sleep. "But what about the parade?" asked the little kid in my head. "If we get up now, we can still make it, can't we?" Adult me answered something along the lines of grumblegrumble sleep grumblegrumble sick grumblegrumble rain. "But it's not raining! And we don't feel that sick!" answered the little kid. "You know you want to go to the parade!" ...and it was completely right. So I got up, got ready in a hurry, got the dog walked, checked the timing, and set off with my camera to see this years parade. On the way, I worked out the logistics in case the timing went wonky - which train to take, where to stand to get out quickly, etc. The result was that I watched the parade from just north of the start point - the parade actually "begins" between 76th and 77th and Central Park West, and I was standing at the northwest corner of 77th and CPW. You don't miss much - all the performers line up near there, so it all works out. It ended up working great - the parade ended at 10:30 at this point, I got home with plenty of time, was early enough to dinner that I helped with the prep, it didn't rain, and I didn't get sicker. Clearly, I made the right decision! :) And of course, I took loads of pictures. :) You can see the set over on Flickr - Macy's Thanksgiving Day Parade.

Marching Bands!!


Balloons!!


Floats!!


Celebrities!!


...and the two people that made me most excited?


This is Grandma. Grandma is the main clown for the Big Apple Circus, which is the circus I've been going to since I was a little girl. When I see Grandma, I become spontaneously 6 years old. I haven't been to the Big Apple Circus in about 15 years, but every year I say "this year, I should go." Maybe this year will be the year...


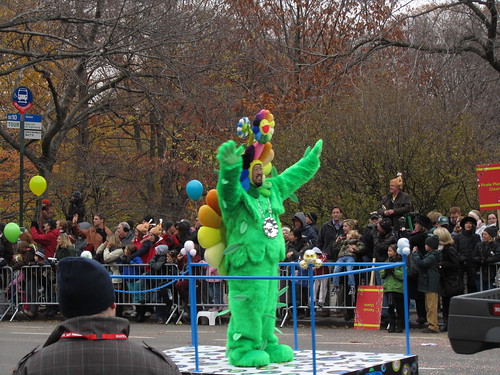
When I saw this costume and the balloons behind it, I knew it was work by Murakami Takashi, who I first encountered in 2007. But when the announcer said that it was actually Murakami in that costume, I was very super excited. I love his work!

After the parade, I had a very nice meal with my dad, his wife, my brother and my step-brother (who I hadn't seen in 6 or 7 years). There was turkey and stuffing and potatoes and pie and more than 5 people could ever eat. Then I drove home again (it's about 1 hr 30 min drive) and when I get back, I had a long telephone chat with my mom (who told me not to come over - I'm going over there today). So all in all, I had an excellent Thanksgiving. And I still have pie.

Happy belated Thanksgiving, everyone! I hope you had wonderful ones! :)

Tuesday, November 23, 2010

Making a "Light Box"

One of the things that I've wanted to do for a while is set aside a spot in my apartment for taking pictures. This isn't so easy to do: my apartment is very small (my living area is less than 300 sq. ft., and even with my kitchen and bathroom I think it's 500 sq. ft. or less), and it's not very well lit (my only windows face w-sw, so I either get very muted light, or direct sunset kinda light), and I've got a lot of stuff (so most of the available space is occupied). However, events conspired to provide me with an extra table, and from that point (over the summer) I've wanted to set up a "photo box" on this table - use a spare lamp and some cloth to make a place where I could take better photographs because I really feel that the quality of the photographs of my dolls is one of my biggest weaknesses.

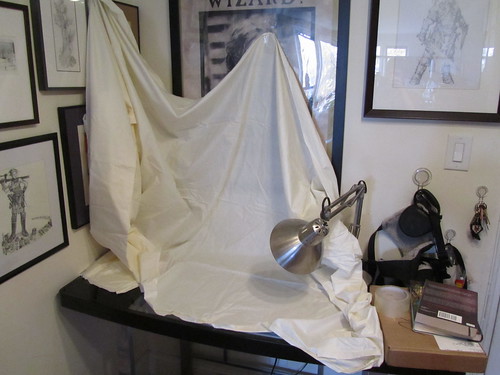
When I realized I felt too sick to engage in behavior require vast quantities of concentration today, I decided that the time had come! So I cleared off the table, grabbed the first almost-white fabric I could find (it's actually a very muted yellow), grabbed the desk lamp I never used, and put it all together:


You can see a little of my art collection in the background. :) (and this is right next to my front door, hence the hooks with the dog's leash and my keys...)

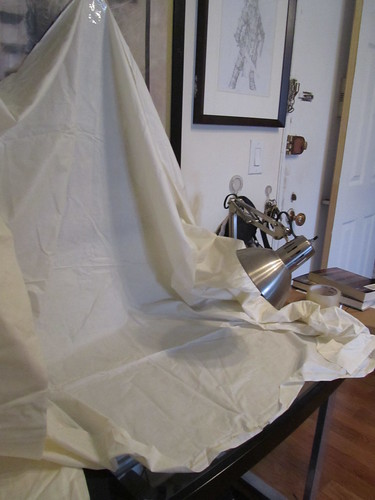
Second angle:


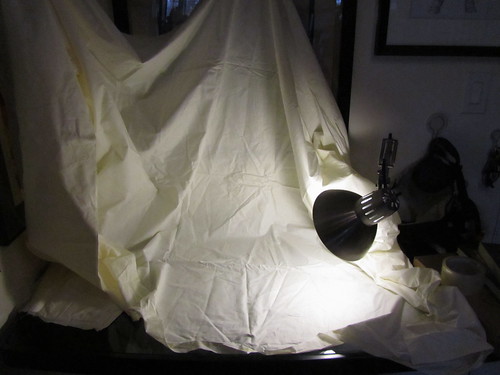
And with the lamp on...


So...it certainly LOOKS like a light box, but the question was, would it take better pictures? Well, let's see! Here are some comparisons of shots I took just "around," and shots I just took in the box. (all the shots happen to be of Santa and Santana, because they were closest to hand). Old shots are on the left, new shots are on the right.


All in all, even though some of them look roughly comparable side by side, I think that the new shots turned out much better - and I think a bit of time using this set up, particularly figuring out the optimal camera settings, will help even more. For the old shots, I routinely had to use ISO 800 and still use very slow shutter speeds, making it hard to get clear shots and resulting in shots that are almost always at least slightly blurry when you look at them close enough. The new shots, on the other hand, were at ISO 200, and at shutter speeds at 1/50th of a sec or faster, greatly increasing the chance that I can take good, crisp photographs. Furthermore, I won't have to wait for the right lighting conditions, as this part of my apartment is lit pretty much the same no matter what, only really varies by day vs. night. And even though the background was faintly yellow, I was able to compensate with my settings, with the result that I think that the colors on the dolls were showing much truer - while that may not show in these shots, getting the colors to look "right" in the new shots required MUCH less fiddling and changing camera settings than it used to.

Areas that need improvement? Well, to optimize the more professional look, I should probably iron the damn cloth (I HATE ironing, but I think I can't avoid it this time). In the future, I might want to consider other color clothes (black is an obvious alternative), and I also might want to consider ways of decorating the areas - but that's for the future. I also need to move things around to ensure that I never end up with a bit of the lamp in my photo, and that the cloth is not draped, but instead lies more or less flat. However, all in all, I'm very pleased with the results of this experiment. Which means I can move on to the next step - once I get back from a meeting this afternoon, I'll iron the cloth, and then I'll retake pictures of all of the dolls that I still have in the house, which will enable me to actually list the dolls for sale on Etsy. I'll post a follow up tonight, if all goes as planned. :)

Saturday, November 20, 2010

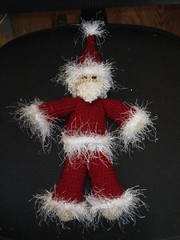
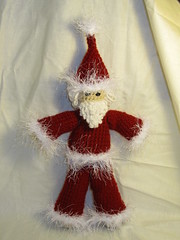
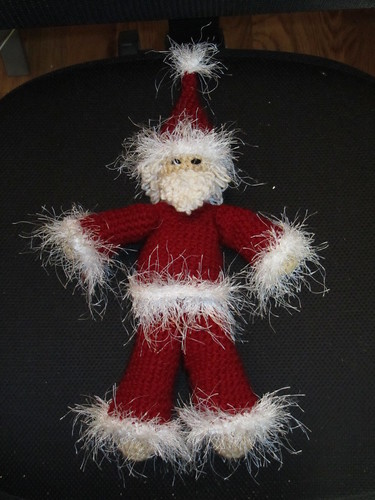
Santa Claus Amigurumi Doll (aka: Santagurumi)

I appear to have come down with a cold, am looking forward to making pumpkin pie this week, and am not sure why I volunteered to work all day tomorrow. Today, I provided support for the folks testing Blub Blub (which has been largely bug free so far...), and wrote up the Santana Squid pattern, which just needs to be read through, math checked, and edited before it'll be ready for testing. I did some other stuff, too. However, this post is to introduce yet another new doll: a Santa Claus, which I can't resist calling the Santagurumi. (also - apology in advance, today's pictures are particularly poor...I couldn't quite muster the energy to do better)


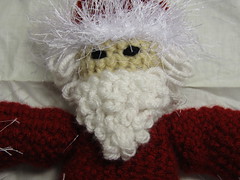
Here's Santa! A look at him will show immediately what I consider to be his biggest problem: the eyes are clearly not right. He doesn't look happy and smiling - he looks mean and scowly. A second version of the doll will have to come up with a solution to this problem (I might just pick the eyes out and try again) - but for now, I just really wanted to be done, so I decided to go with it for now.

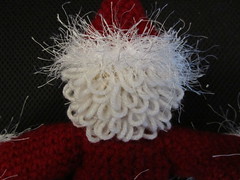
A couple small, dark shots of the head:

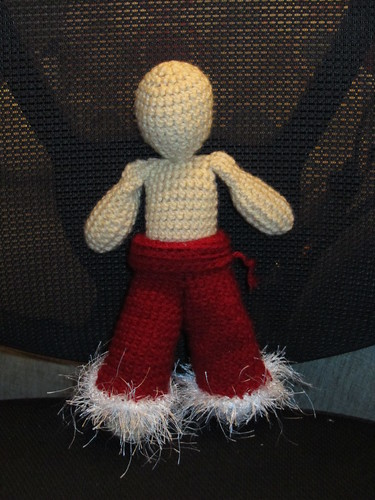
Santagurumi's shirt and pants are removable (but his hat and hair and such aren't). Here he is in only his pants, before I finished the head:


One of the main purposes of this remake wasn't to make Santa, if ya'll will recall - when I finished Tom Seaver, described in the link, I mentioned what I considered to be the biggest problems with the doll (body to big, arms to long, head too small), and my main goal was to fix that. I only made a Santa because I realized that, coincidentally, I had all of the materials necessary to make one already in my stash.

Thus, more than anything, what I wanted was to make an underbody that I was satisfied with - because once I've got a base for a male doll, I can dress it up however I'd like. Here's the base now:

When he's nekkid, his arms look too small, and his head too big, but when he's all dressed up, I think his proportions look excellent.

All in all, I'm VERY happy with how this turned out. My efforts to better size the clothes turned out very well, his hair (while a pain) looks (in my opinion) awesome, and other than his kinda creepy eyes, I'm well satisfied with my Santa.

Amigurumi for Charity!

This is a repost of information in Fresh Stitches blog. I'm going to try to do at least one, and I thought maybe others would be interested as well. Here's what she wrote: (consider all in quotations)

I was recently contacted by a super-sweet woman named Kathy, who is collecting stuffed animals for Casey Cares Foundation, and she’s asked me to spread the word… she needs your help to make amigurumi that will be given to critically ill children.

It’s no secret that’s it’s tough being ill, especially for children. Your hand-made stuffed animal will make a child’s day- and provide them with a huggable companion that will always be by their side.

Here are the details:

Who?
Casey Cares is a foundation dedicated to enhancing the lives of critically ill children, providing much-needed programs to the children and their families. Casey Cares Foundation will be partnering with a children’s hospice, and the animals will go to children at the hospice.

Kathy Guerin has taken on the mission of collecting amigurumi stuffed animals as a special way to help these children.

What?
‘Large-sized’ amigurumi are particularly needed (these guys are going to get a lot of hugs!). Kathy is particularly fond of the patterns in Cuddly Crochet, and has made a number herself. Additionally, FreshStitches has a large number of patterns that are the appropriate size- just read the pattern description and look for animals that are 7″ tall or larger.

Some of the stuffed animals will be given to children who are younger than 3 years old, so there is need for animals with crocheted, child-safe eyes.

When?

Although this will be an ongoing project, the first deadline is February 1st, 2011.

The 10-bed hospice is opening in February, so the goal is to have AT LEAST 10 animals by the opening date- so each child will receive an animal. Any additional animals received will be saved for future months.

Where?

Donations can be mailed to or dropped off at:

Casey Cares Foundation
3918 Vero Road, Suite C
Baltimore MD 21227
Attention: Debi Katzenberger

If you have a group of crocheters making animals in the Baltimore area, you can contact Casey Cares and request a pick-up.

Why?
This one hardly needs answering! Your stuffed animal will be given to a child who greatly needs comforting… and what better way to comfort than with huggable amigurumi?

I know the holidays can be a hectic time… but if you can find some spare time to crochet a stuffed animal, it would be greatly appreciated! Feel free to contact Kathy with any questions. And, thank you for reading!

(end quotations)
I think this sounds like a really great cause, and I hope that some of you will as well!

Wednesday, November 17, 2010

Santana Squid, Ace Pitcher for the Oceans

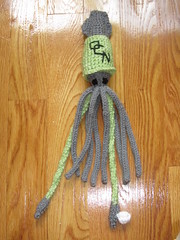
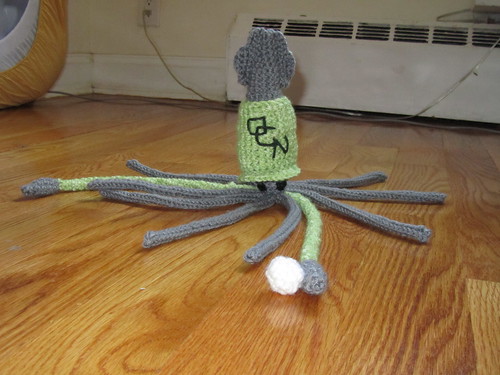
Today, I finished the test/remake of Santana Squid, and while I was at it I added the bits and accessories necessary to put forward my original concept - Santana Squid, Ace Pitcher for the Oceans. This is a play on Johan Santana, ace pitcher for my Mets. This is the first time I've actually written up a short story for one of my amigurumi, something which I'd like to start doing regularly (and add to my old patterns). I've gotten the impression that customers find stories appealing and interesting, and at least one other crafts person has suggested that my impression is correct.

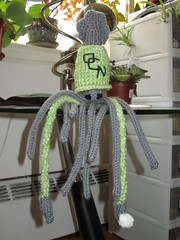
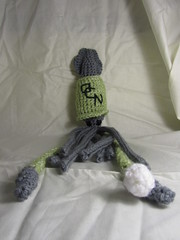
So! Meet Santana Squid!


Santana is the ace pitcher for the Oceans. He’s the first in what I intend to have be a series - the underwater players for the Oceans baseball team. The only other one I’ve got planned with any certainty after Santana Squid is Ollie Octopus, the…other…pitcher. These players - and probably others (an Angel fish for the outfield, perhaps?) will all almost certainly be inspired by players from the Mets, cause that’s my team.


Here's his back. He's #1, cause he's the ace!


Santana was born to pitch. As a youth growing up in the warm waters off the Caribbean, he and his friends would while away the days by playing baseball, but none of them excelled as Santana did. He signed with the Oceans right out of high school, and after less than a full season in their minor league system, the Oceans old warhorse pitcher Goody Goldfish went down for the season with an injury, and Santana got his chance - and he shone. In the years since then, he's became a mainstay of the Oceans line up. Whenever the Oceans have a must-win game, Santana is always on the mound, and he’s never let them down. His best pitch is the 4-tentacle fast ball, but he also throws a wicked curve ball, whose delivery is obscured by the swirling of his tentacles in the water. Santana is a natural born leader, but he generally chooses not to be noticed by the media, a result of his natural reticence...though some attribute it to the way his gray body blends in with the club house paint, helping him avoid scrutiny.


I'm pretty happy with how he turned out, and I look forward to making the other players in the future. I'm also happy to have finally written a story, and that he's a perfectly viable pattern both in and out of uniform, which I think will increase his appeal.

In other news, I've got three people testing Blub Blub. Exciting! I'll write more about that process when it's done.

Tuesday, November 16, 2010

Christmas Displays on 5th Avenue, 2008

This post has been a long time in coming, the follow up to my post from September on the 2009 Christmas Displays on 5th Ave. I promised in that post that I'd post some of my other pics of this, and I'm finally getting around to it as I spend the morning picking out photographs for Christmas cards.

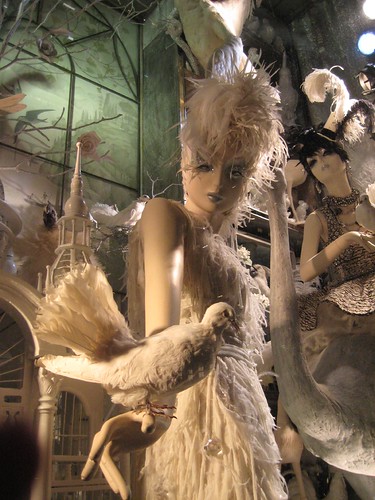
2008 was the first year I ever went downtown specifically to look at the Christmas displays. I started at Bergdorf Goodman, mostly cause I knew it would be awesome, and worked my way down to about 45th street - past Saks and Rockefeller Center - but I didn't go down to Lord and Taylors or Macys. You can take a peak at the set here. Generally speaking, I didn't do nearly as thorough a job as I did the following year, or as I intend to do this year.

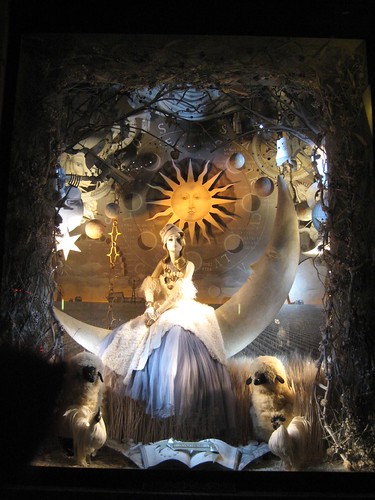
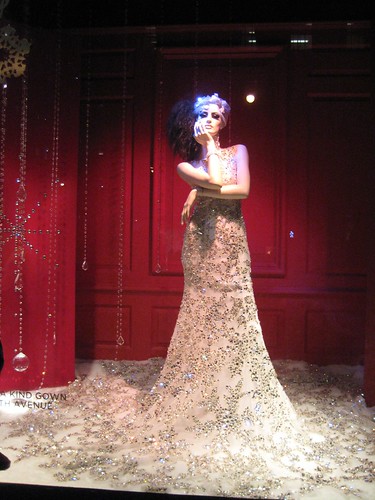
Some of my favorite images include...

Bergdorf:


This display is one of my favorites ever. I have a real soft spot for sun and moon motifs...

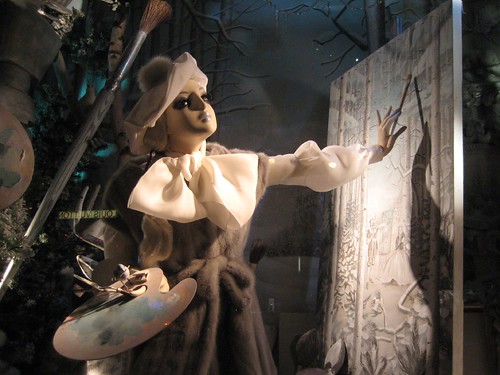
Saks:

The panels of this display rotated to show more snowflakes.


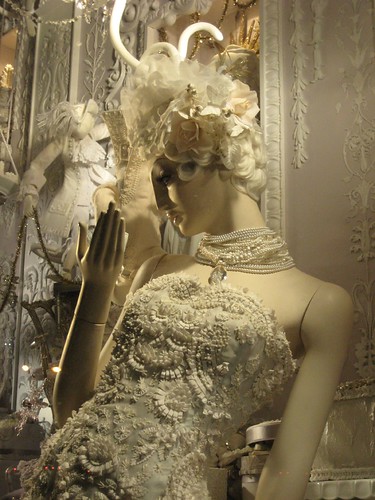
Imagine wearing that to a winter wedding!


And one at the Disney Store:


I'm getting really excited for this years displays! You can be sure that once I've taken the pics I'll be sharing them. :)