Tuesday, November 23, 2010

Making a "Light Box"

One of the things that I've wanted to do for a while is set aside a spot in my apartment for taking pictures. This isn't so easy to do: my apartment is very small (my living area is less than 300 sq. ft., and even with my kitchen and bathroom I think it's 500 sq. ft. or less), and it's not very well lit (my only windows face w-sw, so I either get very muted light, or direct sunset kinda light), and I've got a lot of stuff (so most of the available space is occupied). However, events conspired to provide me with an extra table, and from that point (over the summer) I've wanted to set up a "photo box" on this table - use a spare lamp and some cloth to make a place where I could take better photographs because I really feel that the quality of the photographs of my dolls is one of my biggest weaknesses.

When I realized I felt too sick to engage in behavior require vast quantities of concentration today, I decided that the time had come! So I cleared off the table, grabbed the first almost-white fabric I could find (it's actually a very muted yellow), grabbed the desk lamp I never used, and put it all together:


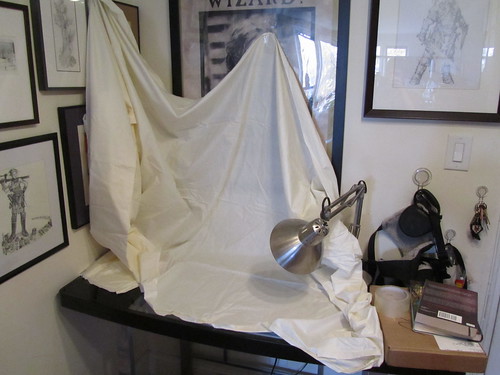
You can see a little of my art collection in the background. :) (and this is right next to my front door, hence the hooks with the dog's leash and my keys...)
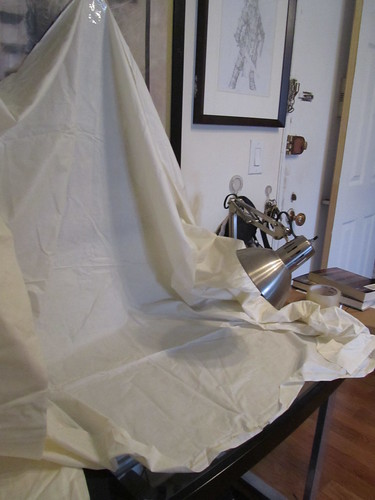
Second angle:


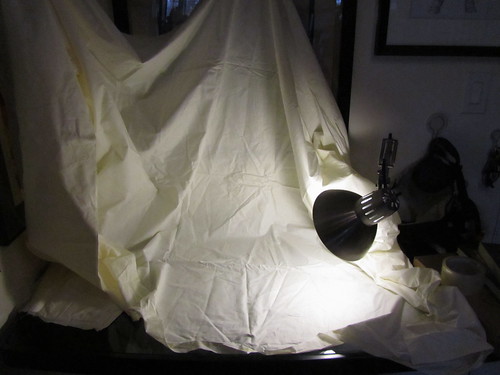
And with the lamp on...


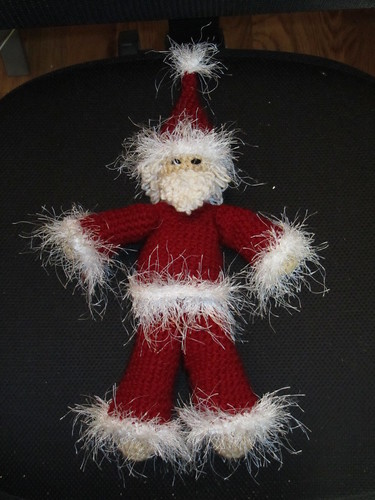
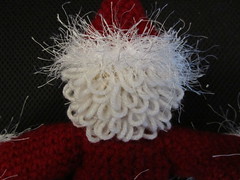
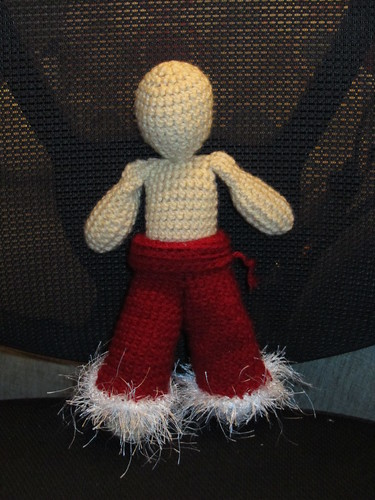
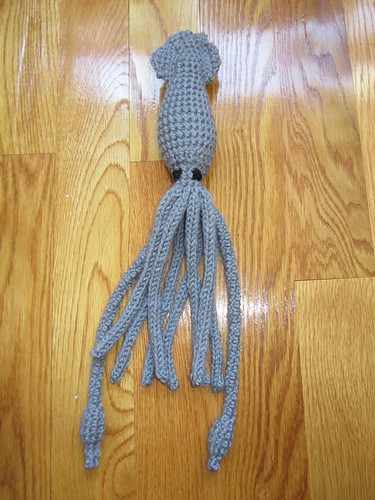
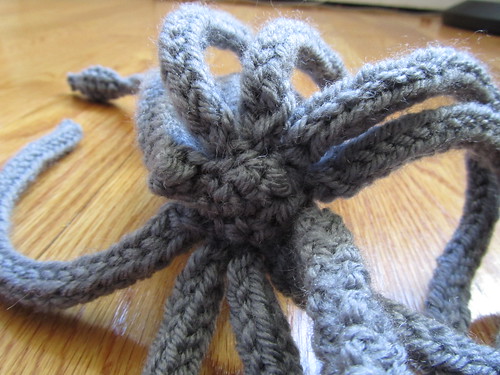
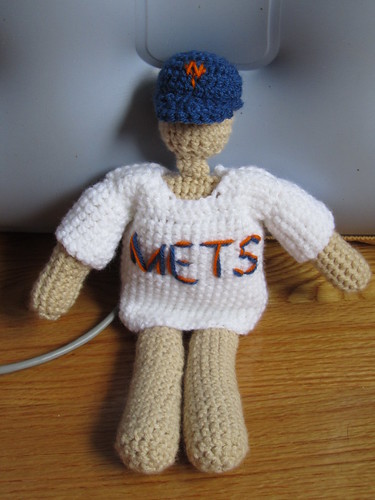
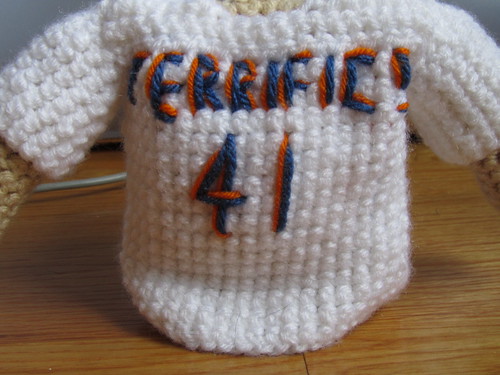
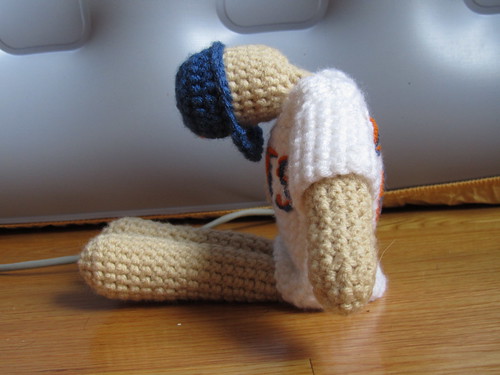
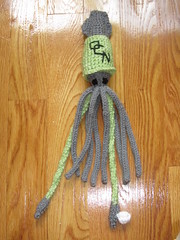
So...it certainly LOOKS like a light box, but the question was, would it take better pictures? Well, let's see! Here are some comparisons of shots I took just "around," and shots I just took in the box. (all the shots happen to be of Santa and Santana, because they were closest to hand). Old shots are on the left, new shots are on the right.


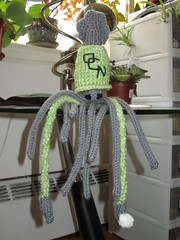
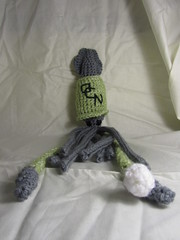
All in all, even though some of them look roughly comparable side by side, I think that the new shots turned out much better - and I think a bit of time using this set up, particularly figuring out the optimal camera settings, will help even more. For the old shots, I routinely had to use ISO 800 and still use very slow shutter speeds, making it hard to get clear shots and resulting in shots that are almost always at least slightly blurry when you look at them close enough. The new shots, on the other hand, were at ISO 200, and at shutter speeds at 1/50th of a sec or faster, greatly increasing the chance that I can take good, crisp photographs. Furthermore, I won't have to wait for the right lighting conditions, as this part of my apartment is lit pretty much the same no matter what, only really varies by day vs. night. And even though the background was faintly yellow, I was able to compensate with my settings, with the result that I think that the colors on the dolls were showing much truer - while that may not show in these shots, getting the colors to look "right" in the new shots required MUCH less fiddling and changing camera settings than it used to.

Areas that need improvement? Well, to optimize the more professional look, I should probably iron the damn cloth (I HATE ironing, but I think I can't avoid it this time). In the future, I might want to consider other color clothes (black is an obvious alternative), and I also might want to consider ways of decorating the areas - but that's for the future. I also need to move things around to ensure that I never end up with a bit of the lamp in my photo, and that the cloth is not draped, but instead lies more or less flat. However, all in all, I'm very pleased with the results of this experiment. Which means I can move on to the next step - once I get back from a meeting this afternoon, I'll iron the cloth, and then I'll retake pictures of all of the dolls that I still have in the house, which will enable me to actually list the dolls for sale on Etsy. I'll post a follow up tonight, if all goes as planned. :)

Saturday, November 20, 2010

Santa Claus Amigurumi Doll (aka: Santagurumi)

I appear to have come down with a cold, am looking forward to making pumpkin pie this week, and am not sure why I volunteered to work all day tomorrow. Today, I provided support for the folks testing Blub Blub (which has been largely bug free so far...), and wrote up the Santana Squid pattern, which just needs to be read through, math checked, and edited before it'll be ready for testing. I did some other stuff, too. However, this post is to introduce yet another new doll: a Santa Claus, which I can't resist calling the Santagurumi. (also - apology in advance, today's pictures are particularly poor...I couldn't quite muster the energy to do better)


Here's Santa! A look at him will show immediately what I consider to be his biggest problem: the eyes are clearly not right. He doesn't look happy and smiling - he looks mean and scowly. A second version of the doll will have to come up with a solution to this problem (I might just pick the eyes out and try again) - but for now, I just really wanted to be done, so I decided to go with it for now.

A couple small, dark shots of the head:

Santagurumi's shirt and pants are removable (but his hat and hair and such aren't). Here he is in only his pants, before I finished the head:


One of the main purposes of this remake wasn't to make Santa, if ya'll will recall - when I finished Tom Seaver, described in the link, I mentioned what I considered to be the biggest problems with the doll (body to big, arms to long, head too small), and my main goal was to fix that. I only made a Santa because I realized that, coincidentally, I had all of the materials necessary to make one already in my stash.

Thus, more than anything, what I wanted was to make an underbody that I was satisfied with - because once I've got a base for a male doll, I can dress it up however I'd like. Here's the base now:

When he's nekkid, his arms look too small, and his head too big, but when he's all dressed up, I think his proportions look excellent.

All in all, I'm VERY happy with how this turned out. My efforts to better size the clothes turned out very well, his hair (while a pain) looks (in my opinion) awesome, and other than his kinda creepy eyes, I'm well satisfied with my Santa.

Amigurumi for Charity!

This is a repost of information in Fresh Stitches blog. I'm going to try to do at least one, and I thought maybe others would be interested as well. Here's what she wrote: (consider all in quotations)

I was recently contacted by a super-sweet woman named Kathy, who is collecting stuffed animals for Casey Cares Foundation, and she’s asked me to spread the word… she needs your help to make amigurumi that will be given to critically ill children.

It’s no secret that’s it’s tough being ill, especially for children. Your hand-made stuffed animal will make a child’s day- and provide them with a huggable companion that will always be by their side.

Here are the details:

Who?
Casey Cares is a foundation dedicated to enhancing the lives of critically ill children, providing much-needed programs to the children and their families. Casey Cares Foundation will be partnering with a children’s hospice, and the animals will go to children at the hospice.

Kathy Guerin has taken on the mission of collecting amigurumi stuffed animals as a special way to help these children.

What?
‘Large-sized’ amigurumi are particularly needed (these guys are going to get a lot of hugs!). Kathy is particularly fond of the patterns in Cuddly Crochet, and has made a number herself. Additionally, FreshStitches has a large number of patterns that are the appropriate size- just read the pattern description and look for animals that are 7″ tall or larger.

Some of the stuffed animals will be given to children who are younger than 3 years old, so there is need for animals with crocheted, child-safe eyes.

When?

Although this will be an ongoing project, the first deadline is February 1st, 2011.

The 10-bed hospice is opening in February, so the goal is to have AT LEAST 10 animals by the opening date- so each child will receive an animal. Any additional animals received will be saved for future months.

Where?

Donations can be mailed to or dropped off at:

Casey Cares Foundation
3918 Vero Road, Suite C
Baltimore MD 21227
Attention: Debi Katzenberger

If you have a group of crocheters making animals in the Baltimore area, you can contact Casey Cares and request a pick-up.

Why?
This one hardly needs answering! Your stuffed animal will be given to a child who greatly needs comforting… and what better way to comfort than with huggable amigurumi?

I know the holidays can be a hectic time… but if you can find some spare time to crochet a stuffed animal, it would be greatly appreciated! Feel free to contact Kathy with any questions. And, thank you for reading!

(end quotations)
I think this sounds like a really great cause, and I hope that some of you will as well!

Wednesday, November 17, 2010

Santana Squid, Ace Pitcher for the Oceans

Today, I finished the test/remake of Santana Squid, and while I was at it I added the bits and accessories necessary to put forward my original concept - Santana Squid, Ace Pitcher for the Oceans. This is a play on Johan Santana, ace pitcher for my Mets. This is the first time I've actually written up a short story for one of my amigurumi, something which I'd like to start doing regularly (and add to my old patterns). I've gotten the impression that customers find stories appealing and interesting, and at least one other crafts person has suggested that my impression is correct.

So! Meet Santana Squid!


Santana is the ace pitcher for the Oceans. He’s the first in what I intend to have be a series - the underwater players for the Oceans baseball team. The only other one I’ve got planned with any certainty after Santana Squid is Ollie Octopus, the…other…pitcher. These players - and probably others (an Angel fish for the outfield, perhaps?) will all almost certainly be inspired by players from the Mets, cause that’s my team.


Here's his back. He's #1, cause he's the ace!


Santana was born to pitch. As a youth growing up in the warm waters off the Caribbean, he and his friends would while away the days by playing baseball, but none of them excelled as Santana did. He signed with the Oceans right out of high school, and after less than a full season in their minor league system, the Oceans old warhorse pitcher Goody Goldfish went down for the season with an injury, and Santana got his chance - and he shone. In the years since then, he's became a mainstay of the Oceans line up. Whenever the Oceans have a must-win game, Santana is always on the mound, and he’s never let them down. His best pitch is the 4-tentacle fast ball, but he also throws a wicked curve ball, whose delivery is obscured by the swirling of his tentacles in the water. Santana is a natural born leader, but he generally chooses not to be noticed by the media, a result of his natural reticence...though some attribute it to the way his gray body blends in with the club house paint, helping him avoid scrutiny.


I'm pretty happy with how he turned out, and I look forward to making the other players in the future. I'm also happy to have finally written a story, and that he's a perfectly viable pattern both in and out of uniform, which I think will increase his appeal.

In other news, I've got three people testing Blub Blub. Exciting! I'll write more about that process when it's done.

Tuesday, November 16, 2010

Christmas Displays on 5th Avenue, 2008

This post has been a long time in coming, the follow up to my post from September on the 2009 Christmas Displays on 5th Ave. I promised in that post that I'd post some of my other pics of this, and I'm finally getting around to it as I spend the morning picking out photographs for Christmas cards.

2008 was the first year I ever went downtown specifically to look at the Christmas displays. I started at Bergdorf Goodman, mostly cause I knew it would be awesome, and worked my way down to about 45th street - past Saks and Rockefeller Center - but I didn't go down to Lord and Taylors or Macys. You can take a peak at the set here. Generally speaking, I didn't do nearly as thorough a job as I did the following year, or as I intend to do this year.

Some of my favorite images include...

Bergdorf:


This display is one of my favorites ever. I have a real soft spot for sun and moon motifs...

Saks:

The panels of this display rotated to show more snowflakes.


Imagine wearing that to a winter wedding!


And one at the Disney Store:


I'm getting really excited for this years displays! You can be sure that once I've taken the pics I'll be sharing them. :)

Sunday, November 14, 2010

Santana Squid - A New Amigurumi!

Not long ago, I was in a position where I was about to travel. I thought I might have some time to crochet while on the trip, so I grabbed the first ball of yarn that came to hand, and while driving to my destination, I thought, what could I make out of gray yarn?

I had two ideas, both of which came to me complete with a story (and stories are my new goal for all the dolls, though it'll be a slow process. :) ) - Ollie Octopus and Santana Squid. I ended up not having any time while on said trip to make either of these dolls, but now I've made Santana Squid.


Santana is one of the smallest amigurumi I've designed, and came together pretty quickly.


As has been the case with many of my ami, I'm worried it's a little too realistic, and not quite cute enough, but even so, I'm not unhappy with how it turned out. Ultimately, I'd like him to be Santana Squid, a squid that can pitch, and contrast him to Ollie the Octopus who can't pitch - this is a baseball joke from my favorite baseball team - but I've yet to decide on just what I could add to the squid to make to get a baseball theme across. Maybe a uniform? Maybe a number on his "back" and a baseball sewn on to one tentacle? I'll almost certainly mess around with this a little when I make my second version of Satnana.


The most complicated part of this doll were the tentacles. I tried to make them "normally" but they didn't look quite right, and they didn't have the squiggly looseness that I really wanted - I didn't want them to be stiff. Then I remembered a post I saw over at PlanetJune, where she did a tutorial on a method for crocheting an i-cord. I asked her permission to use this technique, was told absolutely, and went ahead and used a four crochet version to make it. They turned out just how I wanted, so I'm very pleased (though on this model, a couple of the i-cords have uneven stitches from when I was having a little trouble early on. ;) )

So yeah. New ami! Also, Blub Blub is mostly ready to go. Yay!

Friday, November 12, 2010

Christmas Cards

Today I'm finally back on track after a busy week and some necessary couch time to recover, and one of the first things on my plate was to outreach to my friend April. See, April has been my best customer for my photography cards - one of my main products, but which I've hardly talked about at all. But now the time has come!

So, I make cards. They look like this:

(though not actually blurry, of course ;) )
The insides are completely blank, with the only writing on them being a little writing on the back describing where and when the picture was taken and my copyright. All of the photographs are by me. Each card is hand cut, the paper is recycled, and the photographs are inserted in the card in such a way as to be easily removable for framing or whatnot. I sell them for a mere $1.75 each. Here's a link to one of my personal favorites (different than the image): Light Bulb in the Trees.

Unfortunately, they haven't been selling, hardly at all. But I'm not ready to give up yet!

April had a nifty idea that I had in fact considered, but hadn't been able to muster the time to address. I mean, if I'm going to be selling cards, I should do a big push on Christmas cards, but I wasn't planning to...but her interest has given me heart! She's doing a custom order of Christmas cards, and when I was looking through for ideas for images to make cards out of, I realized I really do have some good images for Christmas Cards. Here are some samples, but there are lots more:
Set: Snow in Central Park
These are images I took last February when we had a huge snow storm.


Set: Snow in New York City
Images I took in Riverside Park in February, 2008.


Some other odds and ends:

This is my personal favorite. ;) I love dinosaurs...


...and I have loads and loads more. So! Here's the advertisement part. :)

Do you write Christmas cards? If you are in the market for a truly special set of cards, I can work with you to pick out the images you like best from over hundreds of images I've taken of fall and winter, and custom print and cut you a set of cards just for you! I'm selling 10 cards for $15, 15 cards for $20. If you'd like more than that, I can do that to - we can discuss price based on the number. Each card can have it's own image, or all of the cards can have the same image, or anything in between! So get in touch with me on my blog, my Hive account, my Etsy, my Facebook account, or just by e-mail at unforth AT yahoo.com, and lets make some cards!

Wednesday, November 3, 2010

Tom Seaver Amigurumi Doll, Part 2

This post is a bit late, as I finished the clothes for the doll about a day after I finished the body, but I had a couple other posts to do and have been very busy. As for today, I'm exhausted, so not tons of commentary on this one: I finished the Tom Seaver doll! This pretty much meant taking the body I had already made and adding a hat and a shirt. And here it is:


Over all, I'm pretty happy with how it turned out, though I think the addition of the shirt clearly revealed the weaknesses in the original doll design, and in the next version I make, I'll be:
1. Making the head bigger
2. Making the arms shorter
3. Making the body (underneath the shirt) more narrow)
The next version will probably be a Santa, as I think I have all the right colors around the house (including some white fun fur, I hope...)


Another minor problem was that the neck was too long in comparison to the head so the head kept wanting to flop down.


Back stitching the logo on the front and the name on the back was time consuming but fun, and it turned out how I wanted pretty well. Seaver's number was 41, and his nickname was "Tom Terrific," thus instead of "Seaver" on the back, I wrote "Terrific!" Well, I thought it was cute. :)


So...that's that. :) Right now, I'm working on a squid - might even be done tonight, though it's hard to say cause I'm really, really beat.

Monday, November 1, 2010

Happy Halloween, Everyone!

I love Halloween. I look forward to it every year, and as with many recent years, this year I made a costume. This year, the plan was that I would go to the Halloween party held in Columbus, OH on Saturday night. As such, I wanted to wear something that
a. fit my taste
b. would be warm enough to wear on an October evening
c. would show off all the work I've done at the gym the past year.

I started out with a pattern made by Simplicity:

Specifically, I wanted to make the image on the right. However, I was really stuck on item c: how could I make a costume that fit my taste for the old fashioned while still being kinda sexy? Finally, the solution struck me while I was on the way home from Con on the Cob a couple weeks ago: I wouldn't make the sleeves, I would make the over dress, and then bustle it to be short, with no under dress underneath it. I would use a peasant shirt I had made for a prior costume, and a corset I bought from Timeless Trends a few years ago. Oh, and boots. Cause I love boots.

This plan ended up working pretty much exactly as I envisioned it. I sewed the overdress in personal record time (5 hours or so), and I wore it on Saturday evening. It didn't quite keep me warm, but I managed...


I even got some of the positive attention I had been hoping for...only to discover that such attention actually makes me very uncomfortable. I probably should have expected that. Anyway, that was my Halloween! Here are some pics of some of the highlights of the costumes I saw:


"Short North" is the name of the neighborhood where this Halloween party was.


...which is why when I wrote on this Facebook wall, I said, "David has friended the Short North." I got props for that one, I was happy. :)

I'm going to link to this one instead of post it, because it is political in content, and I'm NOT trying to start a political debate, but I did find this person dressed as Glenn Beck at a Tea Party was pretty funny.


She said she was dressed as her mother.


In terms of creativity, one of the best I saw.


Rub a dub dub! The best part were their labels, which said "I <3 Meat," "I <3 Wheat," and "I <3 Wax." In addition to the random folks in costume, one of the events at the Halloween party was a runway show of designer Halloween fashions. 10 local designers entered, and a winner was chosen by the judges. Given the crowd, the dark, and smoke machine, etc., this proved VERY hard to photograph, but here are a few shots that were successful:


My best shot was coincidentally of the design that ended up winning.

So sorry for the image-heavy post, but, well, I love Halloween, and there were a lot of good costumes. Hope everyone had a great day! :)